Showing posts with label crafts. Show all posts

Saturday, September 13, 2014

DIY Magic Band Decorating

Magic Bands

When Magic bands appeared on the scene I remember thinking they were pretty plain. Soon after Disney rolled out all their Magic Band accessories and I remarked to my husband "those are cute, but I could make them make them pretty without all that." Cue my first stay on Disney property ever to prompt a little Pinterest research. Miss Roo got these adorable Frozen tattoos in one of her birthdays gifts. It was super easy and they turned out great.

Materials

  • Magic Bands!
  • Disney Themed Temporary Tattoos
  • Clear Nail Polish
  • Sparkly Nail Polish
  • Small Skewers/Qtips
  • Scissors
  • Wet Washcloth/Paper Towel
Supplies Tattoo

Choose your tattoo and cut it out. I found long slim-er tattoos fit best. Cut as close to the design as you can. Remove the the clear film and place it face down on your band. Cover with a wet washcloth for about 20 seconds. Make sure you don't move your tattoo around while applying it, it will cause tears. Gently peal off the backing paper. Allow your tattoo to dry. Then apply a thin coat of nail polish evenly over top of the tattoo.

Clear Coat

Once your clear coat is applied use a skewer to clean up any part of the tattoo that goes over the edges. Apply sparkly nail polish as desired. For Roo's pink band I used pink sparkly polish on the Mickey head and in a thin coat over the rest of the band. For another band I used silver sparkles on top of the snow flakes and Mickey head. On the last two I applied a coat of silver sparkles over the whole band. Once you're done allow to dry completely and you're all set!

Finished Bands Roo's

In Action

Princess Roo eating a Mickey bar and sporting her sparkly magic band.

Friday, September 12, 2014

DIY Disney Autograph/Scrapbook

It's crafty time! After discussing the Disney trip with my partner in crime I was worried that Roo would feel left out because Boo has an autograph book and always has it signed. My family has never done the autograph thing, but with everything being so match-y and even for our birthday princesses I decided she should have something. I decided as long as I didn't spend any money on it it would be a nice way to de-stress.

Cardstock Supplies

Materials

  • Thin Cardboard (ex: cereal box, shirt box, etc)
  • Card Stock in a variety of colors
  • Scrapbooking paper
  • Glue Stick
  • Crop-a-dile/hole punch
  • Disney Embellishments (Stickers, Paper, Pictures of Characters, etc)
  • Scissors
  • Glitter Pens/glitter
  • Ribbon
  • Metal Rings
Front Cover Front Cover Inside

I plucked a silver shirt box from our recycle bin for the cover. Mike helped me cut two even sized rectangle pieces about 6x8in. I wanted mine a little larger than the standard autograph books because I wanted to be able to add photos, tickets, etc after the trip. Once we had these two silver rectangle cover pieces Mike suggested we emboss it. We printed an image of Minnie Mouse's head (just the outline) and then laid the paper over the silver side. Pressing down very firmly with a pencil we traced Minnie. Viola! Super simple.

Next, I flipped the cover over and cut a piece of scrapbook paper to glue over top of the cardboard. I chose a silver sparkly piece of paper because I wanted to create the bibbidi bobbidi boo moment. After I had my magic sparkly background I added a Cinderella sticker in the corner. Next, I drew a pumpkin on orange paper. I traced a large circle and wrote "Princess Riley's Birthday Adventure 2014" then I erased some of the edges and made them more pumpkin-shaped. I used paper with a subtle texture and drew lines with colored pencils and markers. After I had my pumpkin I used my Martha Steward vine cutter and green paper to make pumpkin vines. I placed the pumpkin in the top corner and then make vines shooting out in all directions as if the pumpkin were caught in the moment right before it became the carriage.

Back Cover Back Cover Inside

I kept the back cover super simple. I just put a Tinkerbell sticker in the center and a "Disney Memories" sticker beneath that. These are all things I had laying around, a lot of people have given me their excess craft supplies especially Disney themed (and I soooooo appreciate them). If you're not as fortunate as I am most of the background paper and stickers are available at any craft store or even Amazon. Then I flipped it over and covered the ugly cardboard inside with this adorable rainbow Mickey silhouette paper. It didn't line up exactly right so I added some chocolate brown ribbon on either side. I'm so in love with that paper!

Vintage Mickey Page Royal Ball

With covers down it was time to make pages. I traced the cover onto solid card stock and cut ten pages. Next I embellished each page with stickers, background paper, ribbon, glitter. I just choice themes for each page based on my craft supplies. I have a vintage fab five page, a Snow White and the seven dwarfs page, a Cinderella's castle page, a mad tea party page, and an under the sea page to name a few. When adding glitter I made sure I stuck to one area so it wouldn't cause bumps in signatures. Feel free to embellish front and back I did for a few of mine. As I finished pages I laid them under a heavy book to dry (unless they had wet glitter). When I couldn't find the exact thing I wanted a picture of/sticker for I did a Google image search and printed it out. One of my favorite pages I made has a princess group shot that I printed that includes Aurora in the now rare blue dress (my favorite!). Remember to steer clear of putting anything to close to the left edge where you need to punch your holes.

Hole Punch Template Holes

Now for me, deciding the order of the pages was tricky. When I cut my card stock I split up the colors neatly, but when embellishing the pages I'd changed the which pages should be together. I cleared my table of craft supplies and moved the pages around and around until I was happy. Next, I used a scrap piece of cardboard and measured the left side of a page against it, marking "X"s for my three holes. Then I used my template and crop-a-dile to punch holes in the covers and pages.

Once all the holes were punched I had to put each ring through one page at a time. I got the smallest size, thinking there would be less wear and tear, but if your planning to continue adding pages the larger size rings are probably faster to put on. Once each ring was closed I gently tested turning pages. My holes turned out to be a bit to far in so I trimmed the edge (again leave yourself that margin, just in case). Once the pages turned freely, I chose some red ribbon with white polka dots a la Minnie and cut three strips. You just need enough to tie little knots, they don't need to be even. I tied a ribbon around each ring. Ta-da!

Page Test Finished

Wednesday, September 10, 2014

DIY Disney Shirts

I decided the girls needed special shirts. Princess birthday trip shirts and they could be the gift they open to reveal the trip. Mike decided I needed to learn how to silk screen my own shirts and bought the supplies which gave us some fun options. After a brief tutorial on how screen printing works, I knew we needed Cinderella's silhouette. I wanted it to be clear it was their birthdays and we already had their names in fun princess font too. Ready, set, shirts...

Materials

  • White Shirts (I got mine at Target for $4 they had little bows on one shoulder)
  • Silk Screening Kit or alternately this technique with freezer paper
  • Screen Printing Ink
  • Transparency Film
  • T-shirt Transfer Paper
  • Images you want to use & Photo editing software (we used Paintshop Pro)
  • A Birthday Girl or Two!

Design

Film & Transfer Front Design

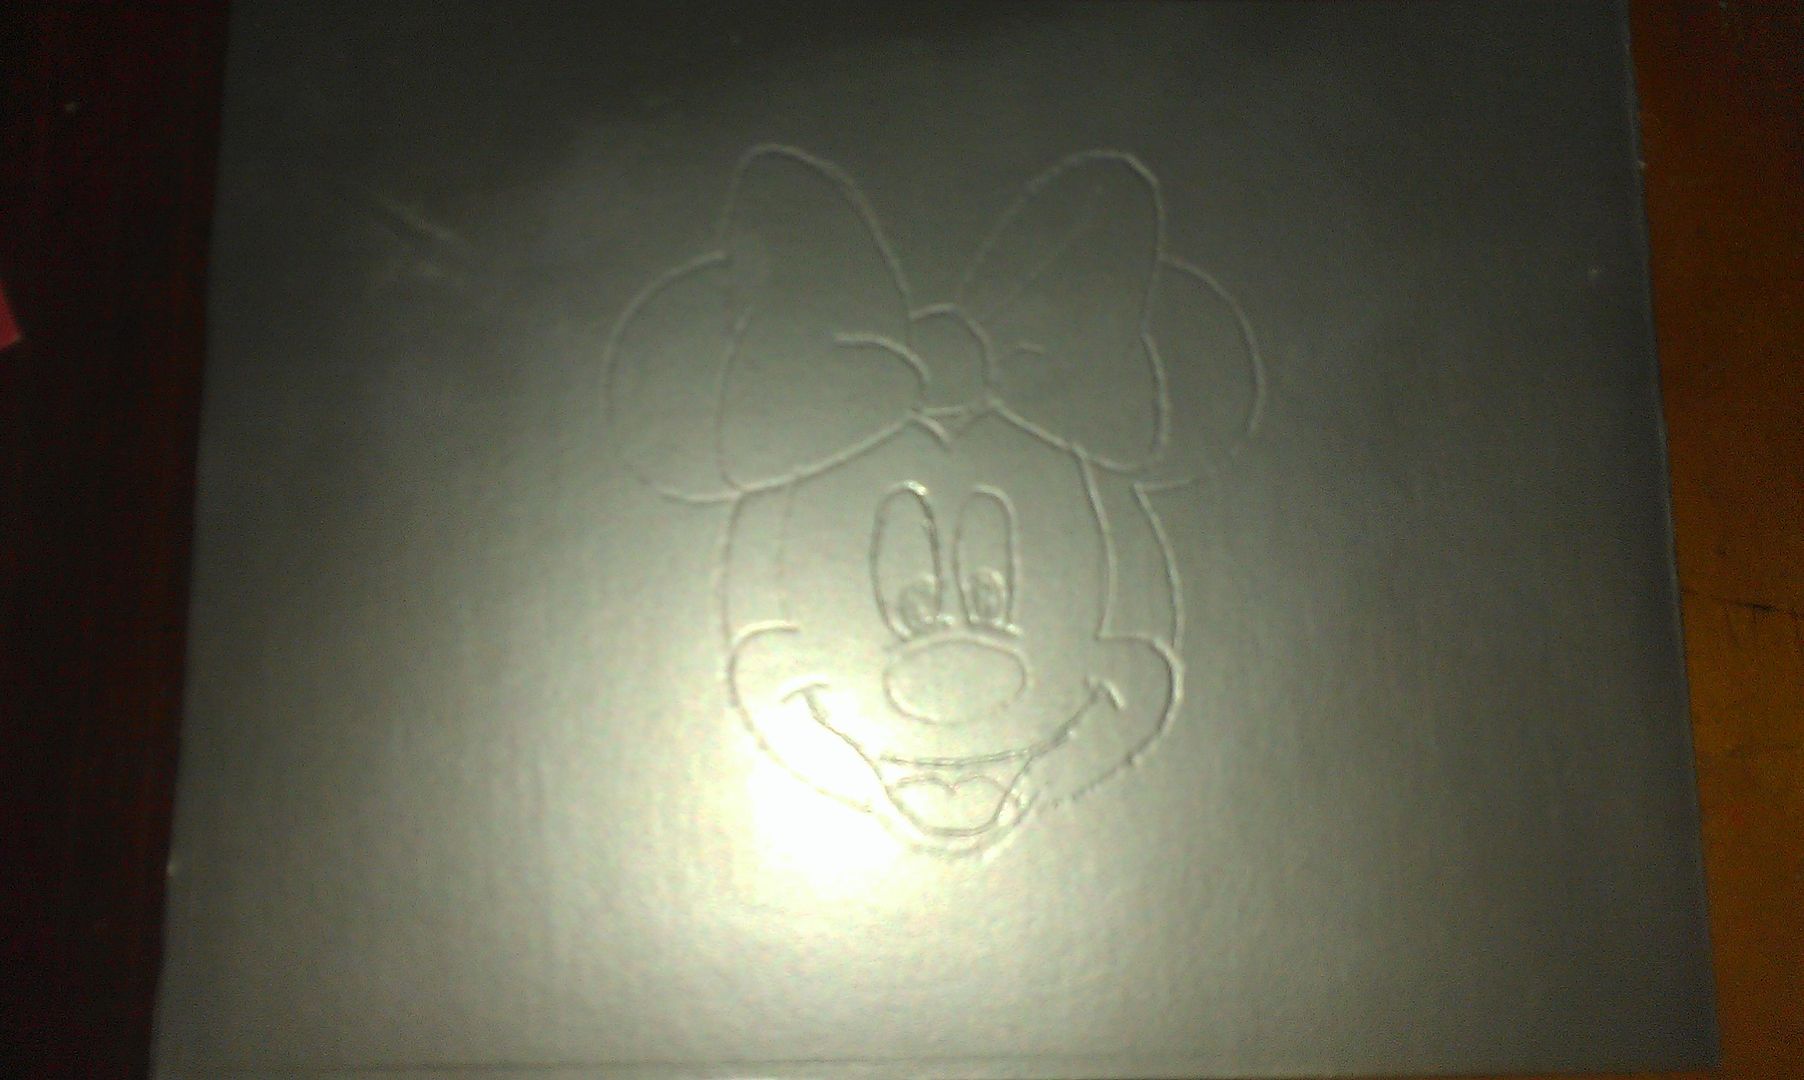
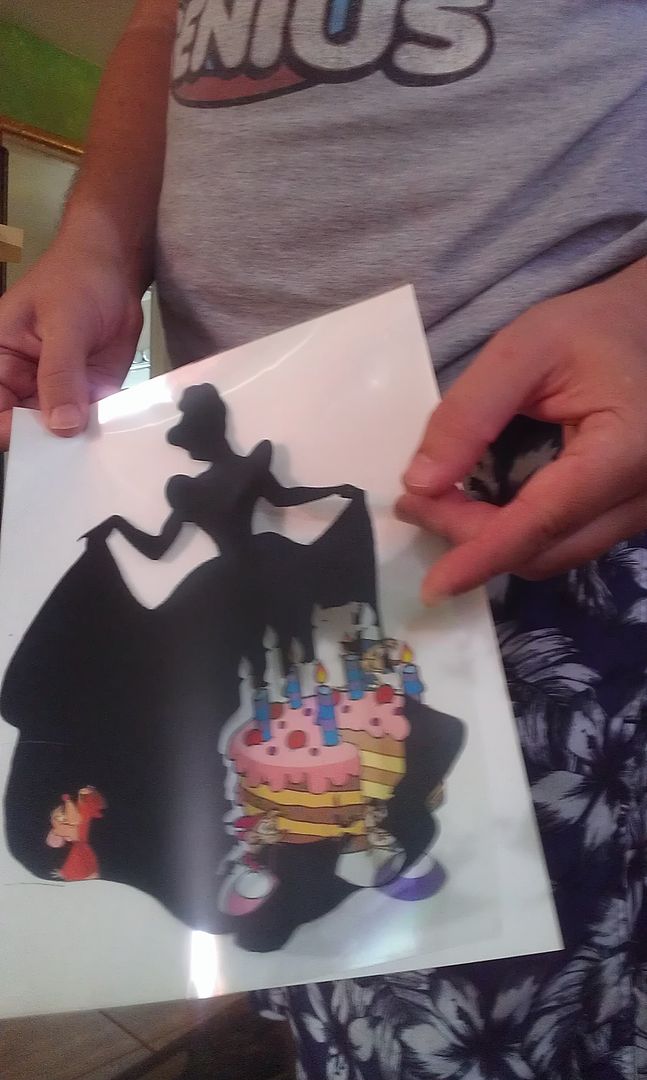
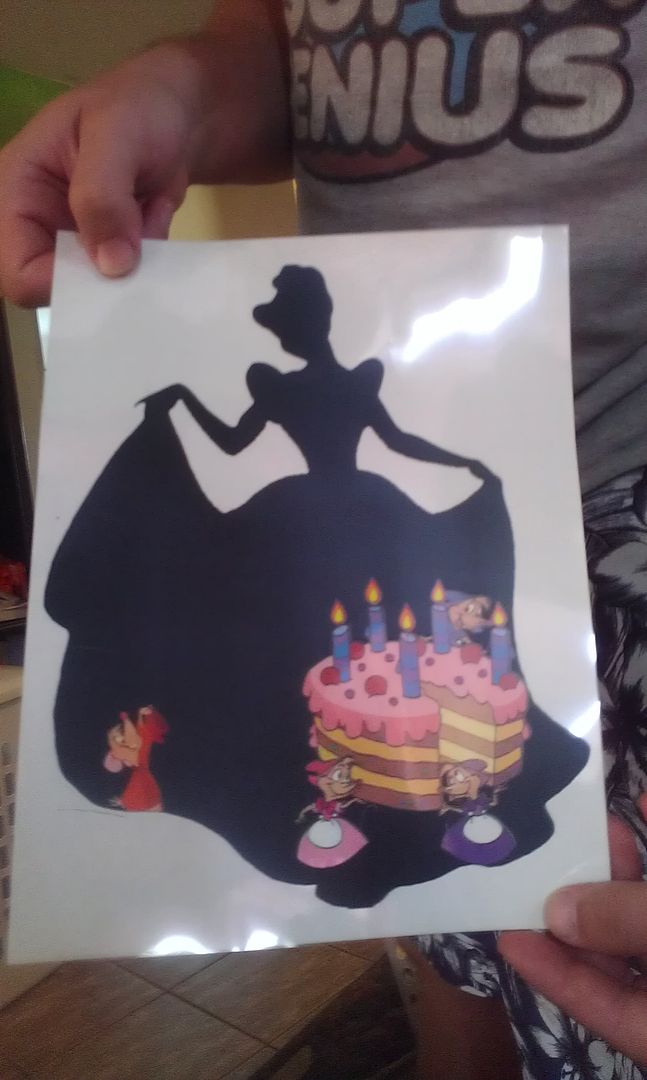
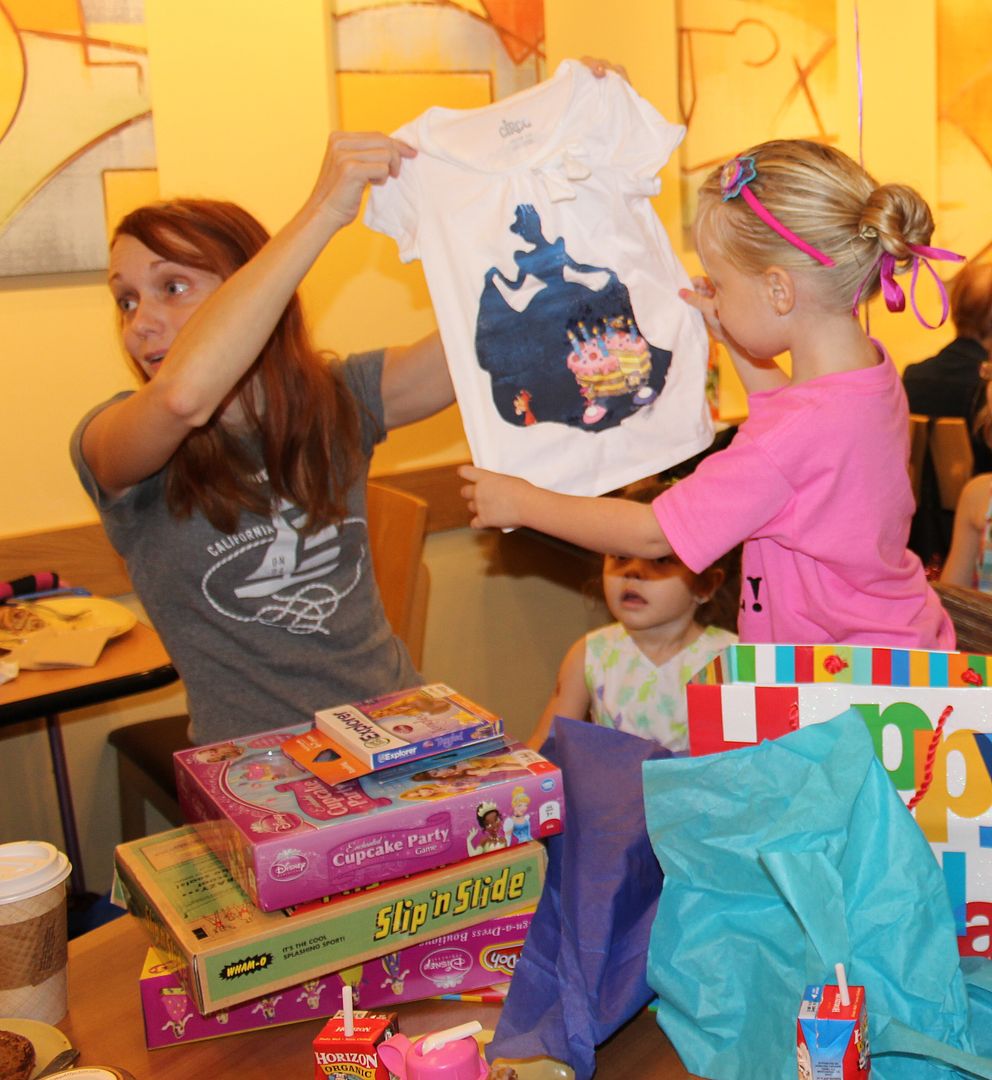
I chose the silhouette of Cinderella holding up her gown on either side to admire it. It's a great shape and totally appropriate for some little girls getting princess make-overs via fairy godmothers. I used Paintshop to make a transparent background for the silhouette. We decided to add Cinderella's mice carrying a birthday cake across the bottom. After lots of image searches I gave Mike a few good images of Cinderella's little friends and a birthday cake. He edited out the mice in appropriate positions for cake carrying and pieced together the images for the front and back of the shirt. After all that editing, Mike cut the shape of the mice running by out of the silhouette. First, he made a layer that was just the mice with contrast adjusted all the way to white with the silhouette behind them (for the transparency). Then he made a second image with just the mice in regular color for the t-shirt transfer paper.

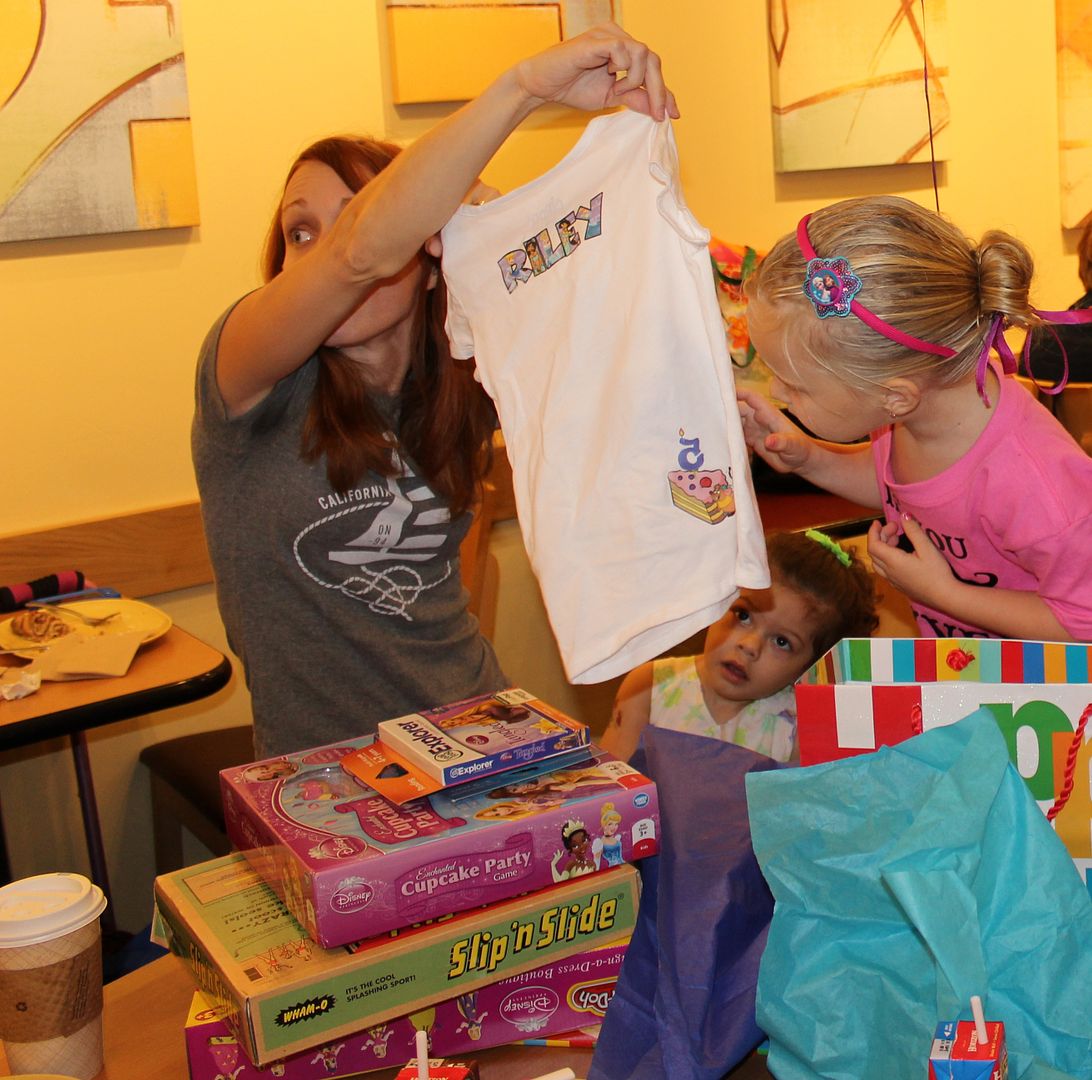
On the back of the shirt we had each girl's name in princess font on the top and then Gus Gus holding a match next to a piece of cake with a "5" candle (that he put in backwards, oh Gus Gus). Everything except Cinderella is going to be an iron on transfer. We wanted to avoid doing the whole shirt as an iron on because they don't allow the cotton to breathe and it gets hot. Plus, silk screening, Yay! We decided to do Cinderella in a blue gradient, but I've seen lots of folks choose hot pink and it's adorable.

Print your silhouette on your transparency film. Don't forget to take the film out before you do any day to day printing. Then make a page of all your iron-on elements in Paintshop. Don't forget to reverse them so they will face the right way on the shirt! Print them out on your t-shirt transfer paper.

Gus Gus Cake Princess Font

Making Them

First, paint a thin layer of photo emulsion on both sides of the silk screen. Allow that to dry in complete darkness overnight.

Next, cut out you're iron-on elements with as little white around them as possible. I recommend tiny sewing scissors for small details. Do not cut them apart. Leave them connected so that they are all in the same positions relative to each other. Iron on following the t-shirt transfer paper instructions. You can look at your Cinderella on the transparency as a guide to show you where to put the mice on the front of the shirt.

Then lay the transparency film on top so that the mice match their outlines and leave in strong direct light (sunlight, strong incandescent lamp, etc). The brighter the light source the shorter the time it takes. We used my Ott lamp and it took about an hour, direct mid day sunlight would have taken 25min or so. During this process the photo emulsion exposed to light is bonded together into a plastic-y substance and the emulsion shaded by the transparency film remains more chalk-like. Wash everything you can off the screen this creates your negative space. Prepare your shirt by putting something flat and smooth (not bumpy like cardboard) in between the layers of your shirt. Use something that will wipe clean if it gets inky. Mike recommends particle board.

I got four shirts, just in case and I recommend doing a test run if this is your first time. Next, place your shirt underneath the screen. Arrange your paint along one edge and then squeegee across your stencil. We used Speedball screen printing ink. We did had the paint so it went from lighter blue into darker blue towards the bottom of the gown. We mixed and marbled the inks ourselves into two cups. One with more of the darker color, the other with more of the lighter and poured them out into two blobs on paper plates. That way the paint would marble itself. Allow the shirt to dry completely.

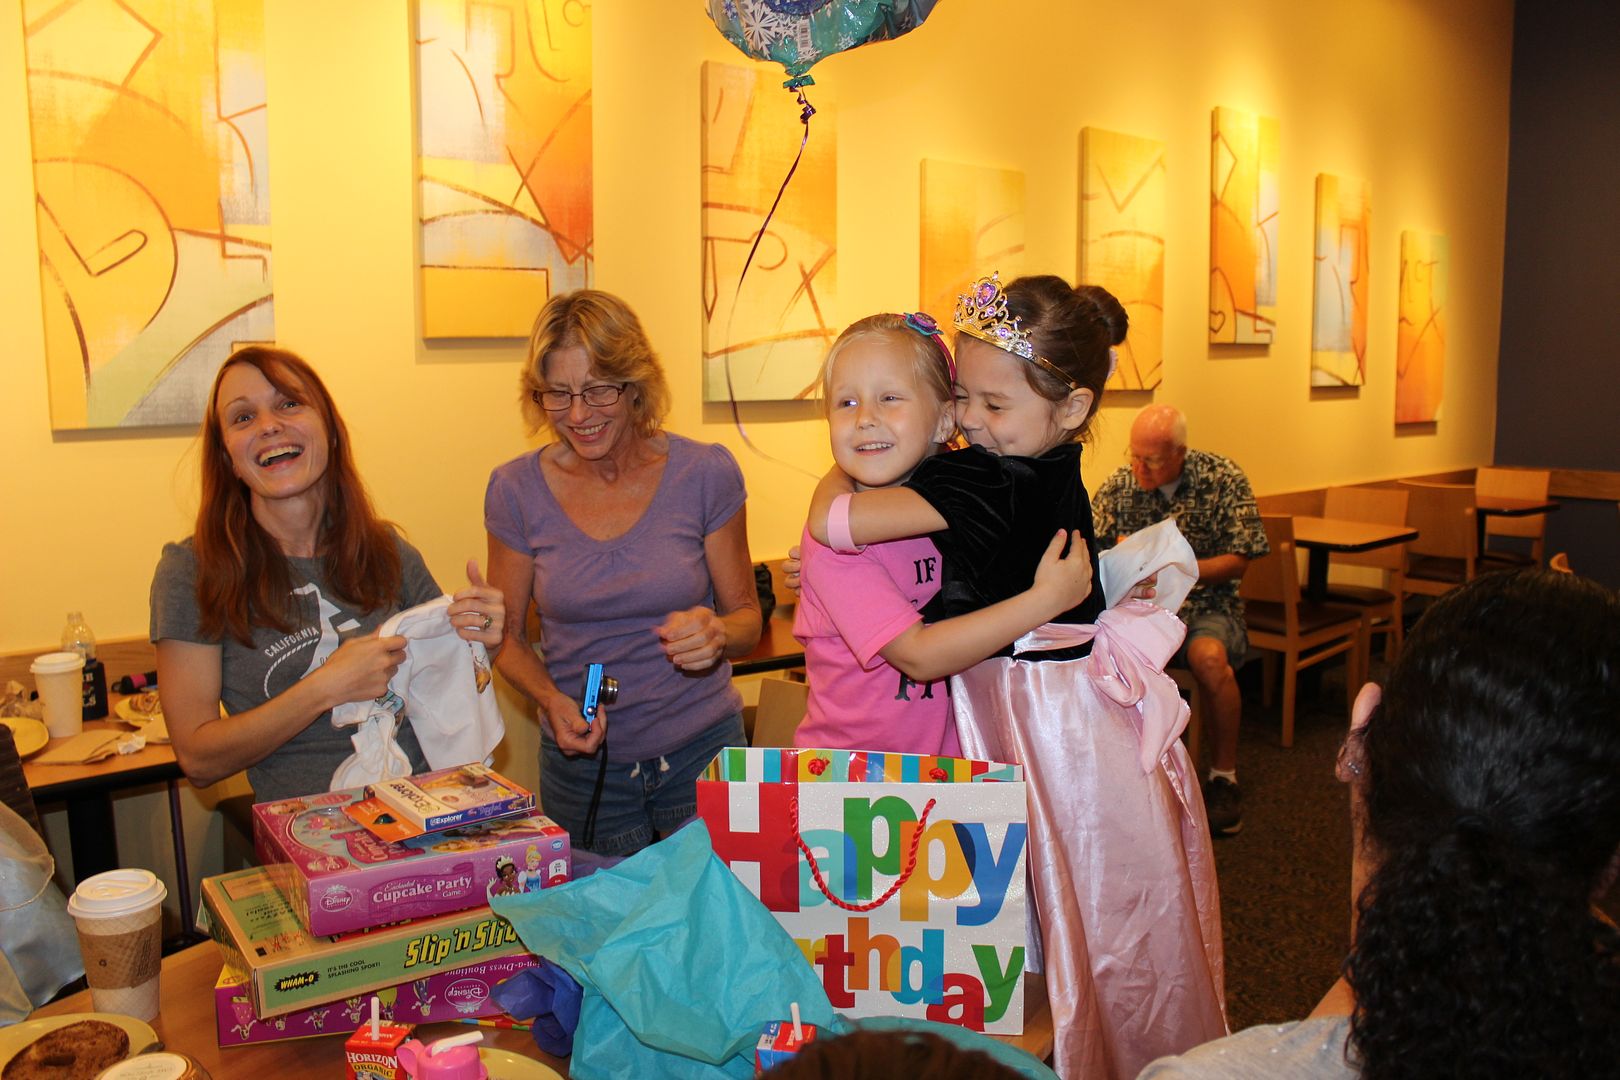
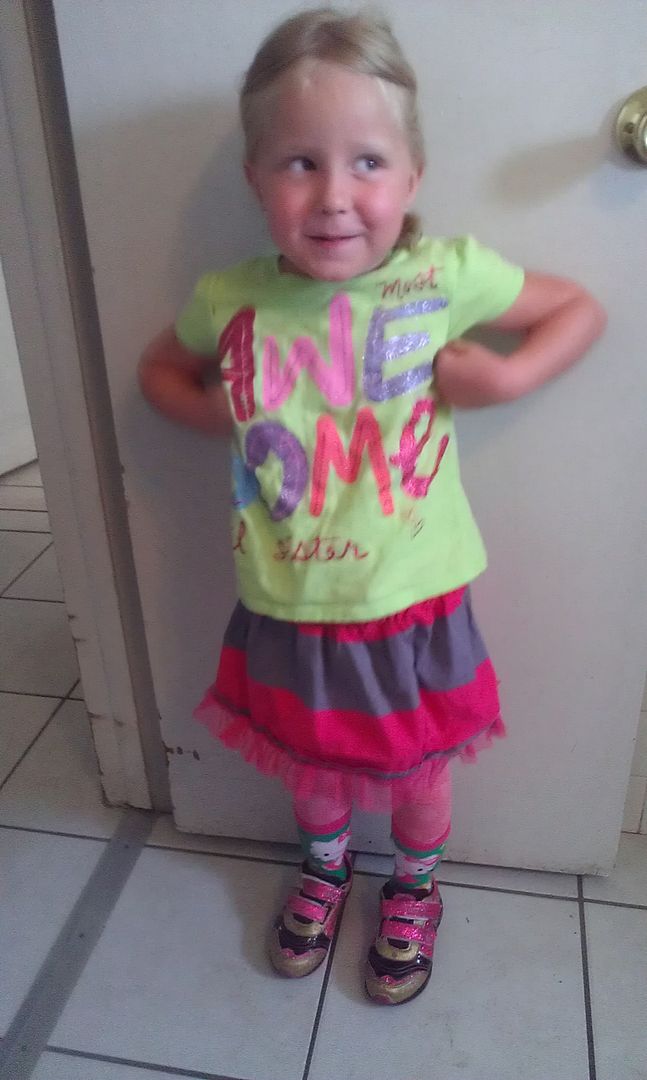
Give them to the Birthday Princesses

Finished Front Princess Font

Reactions!

Smiles & Shock Hugs

The moms are excited too!!

Woohoo!

Friday, June 27, 2014

Summer Camp Week 3

Miss Roo

Japan1 Candy Sushi
Chopsticks Chopsticks2

This week was international travel week! They learned about England and made their own Big Ben. They learned about Japan, had candy sushi, and practiced using chopsticks.

Wet Wednesday BearinPurse

Funky Friday

They had Wet Wednesday and this time they got to run through sprinklers! Thursday was New Zealand day and they cooked anzac biscuits, sweet coconut oatmeal cookies. Friday they learned about Mexico. Roo picked out her outfit Friday with no guidance at all. All I did was her hair that day. Speaking of hair...

Elsa Hair Heart Hair

Mom gets a gold star for a successful Elsa braid on Friday! Woohoo! Another semi-successful hair experiment we did was hair hearts. It did NOT look like the Pinterest pin, but they did resemble hearts. She wanted hearts in her hair to match her new leggings that are pictured above with little white hearts. I tried it at 7am free-form twisting and pinning. I wish I'd done it on wet hair to start, but it held up great. Everyone at school recognized that it was supposed to be hearts.

Isaac

Last Day of Camp

Official last day of camp photo.

Alien Mask

Sadly, this is Isaac's last week of camp. Monday he finished his "About Me" power point presentation. Tuesday he played hookie from camp to go to a theme park. It was a trip his grandmother took him on with his cousin to reward them both for completing 5th grade with good grades.

Wednesday the kids at camp broke into teams and launched rockets. He also presented his "About Me" power point presentation. He said the presentation went well. At home he completed his first Tenmarks (a math website) goal for the summer and earned a Slurpee. Thursday was the final day and they took a field trip to the aquarium. Fun stuff! When he got home on Thursday we went to the library for some more science experiments. There was even a robot dance party and alien mask craft this week!

Week Three Video Wrap Up

Weekly Wrap Up Questions
1. What did you learn that you didn't know before?
2. What was the worst part of your week?
3. What was the best part of your week?
4. What was your favorite meal?
5. What was the weather mostly like?
6. What was your favorite activity/project?
7. How many books did you read?
8. What were they called?
9. Which book was your favorite?
10. Where are some places you went this week?

Monday, June 9, 2014

Ready, Set, Read!

Every summer the library launches a summer reading campaign. They have special shows and activities to encourage kids to check out and read books. They even have an incentive chart school age kids can fill out to earn prizes! The kick off event this time was an awesome science demonstration complete with liquid nitrogen, fire and rockets!

Fire Woosh Tube

It was a great show. It was sponsored by the science museum I had just taken the kids to over Memorial Day weekend. Those are my little scientists front and center in the pink and green. They really enjoyed themselves! After the show they had a raffle and gave 10 lucky kids a brand new chapter book! Guess whose number was the first one picked!

Winner

Isaac got a new Geronimo Stilton book called Curse of the Cheese Pyramid. He was over the moon! That's the second time he's been the first winner called at a library raffle, lucky boy. Riley didn't get called, but I had just given her my last free book from the Kellogg's rewards free book program. It's a Ready Freddy series book about Sharks. She had been looking at it on the way to the library so she was ok not getting called. Oddly enough they called the number right before and right after hers.

Crafts Rocket

After the raffle Riley made a rocket ship with shiny star stickers while Isaac read his new book. I've said it before and I say it a thousand more times, I love the library! Where else can you have this much fun for free? Aside from the fun summer programs and shows the kids and I agreed we'd visit the library once a week this summer (at least).

Library!

Friday, April 4, 2014

March-ing On Part 1

Leeloo
I thought I'd continue catching up by showing you the cuteness that is my dog. Look at that. This picture was taken when I was having a rough day pain-wise and she snuggled up with me. Having her for company really keeps my pain based anxiety in check. Everyone with orthopedic issues should have a lovable furry friend.

Science Meet Report Card
Isaac was notified early in the month that he won the Pride award for Science. Here are the award requirements: "The Program to Recognize Initiative and Distinction in Education awards recognize fifth-grade students who excel in math, science, social studies and writing. Fifth-graders must achieve an “A” average in their subject area to be eligible and demonstrate a positive attitude while scoring highest on a subject-area test. Each student winner receives a medallion and a trophy to recognize their academic achievement." Isaac's Pride award will be for Science." Pretty exciting stuff. In April there will be a big fancy county-wide award ceremony at a performing arts center. Yay!!

He got Honor Roll on his report card and also participated in the county's science meet. He was one of 6 students (2 three person teams) from his school. They were given a written test and then an experiment to perform. There were 86 schools represented (2 teams each) and only first, second and third place awards were given. His team did not place, but he had a great day!

Later in the month his gifted class participated in a math meet. I wasn't invited to witness any part of that one (Boo!), but I'm told there were individual awards and team awards. He told me he almost got third place and his team almost won third place. It was a big month for academic achievement.

Spring Wreath
I made my first Esty sale! I put up the store a little late last spring so I never had an order. I'm up to eight orders since March 4th! It's amazing to have your craftiness and creativity recognized.

Spring Wreath
Mint Oreo donuts at Dunkin Donuts!!!!!

Birthday Dog
Leeloo turned two!

This conversation happened:
Me to Mike: Which Disney couple are we?
Mike: hmmm
Me: Belle and beast? (laughing) Rapunzel and Flynn?,
Mike: Anna and Kristoff. For sure, yeah.
Me: Awww!
(I love it when he talks Disney to me)

Character Day
Isaac as Will Burrows from the Tunnels book series for character day.