


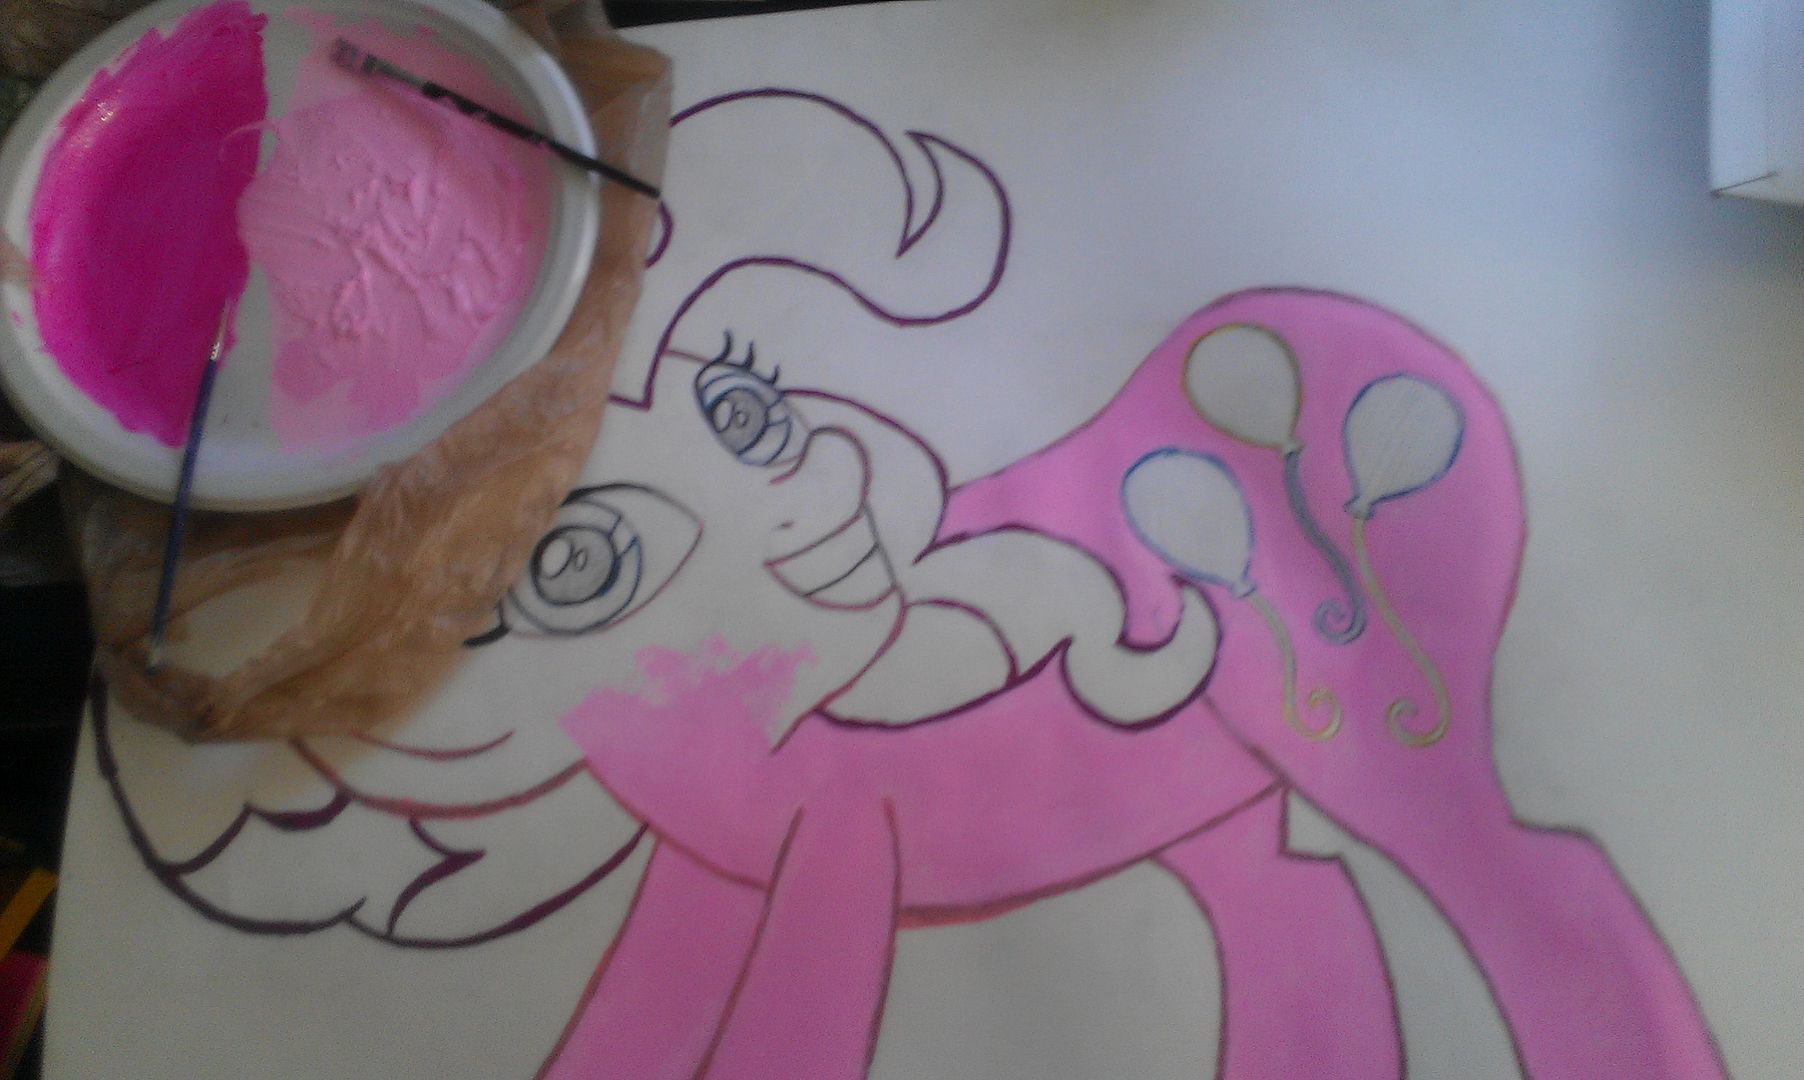
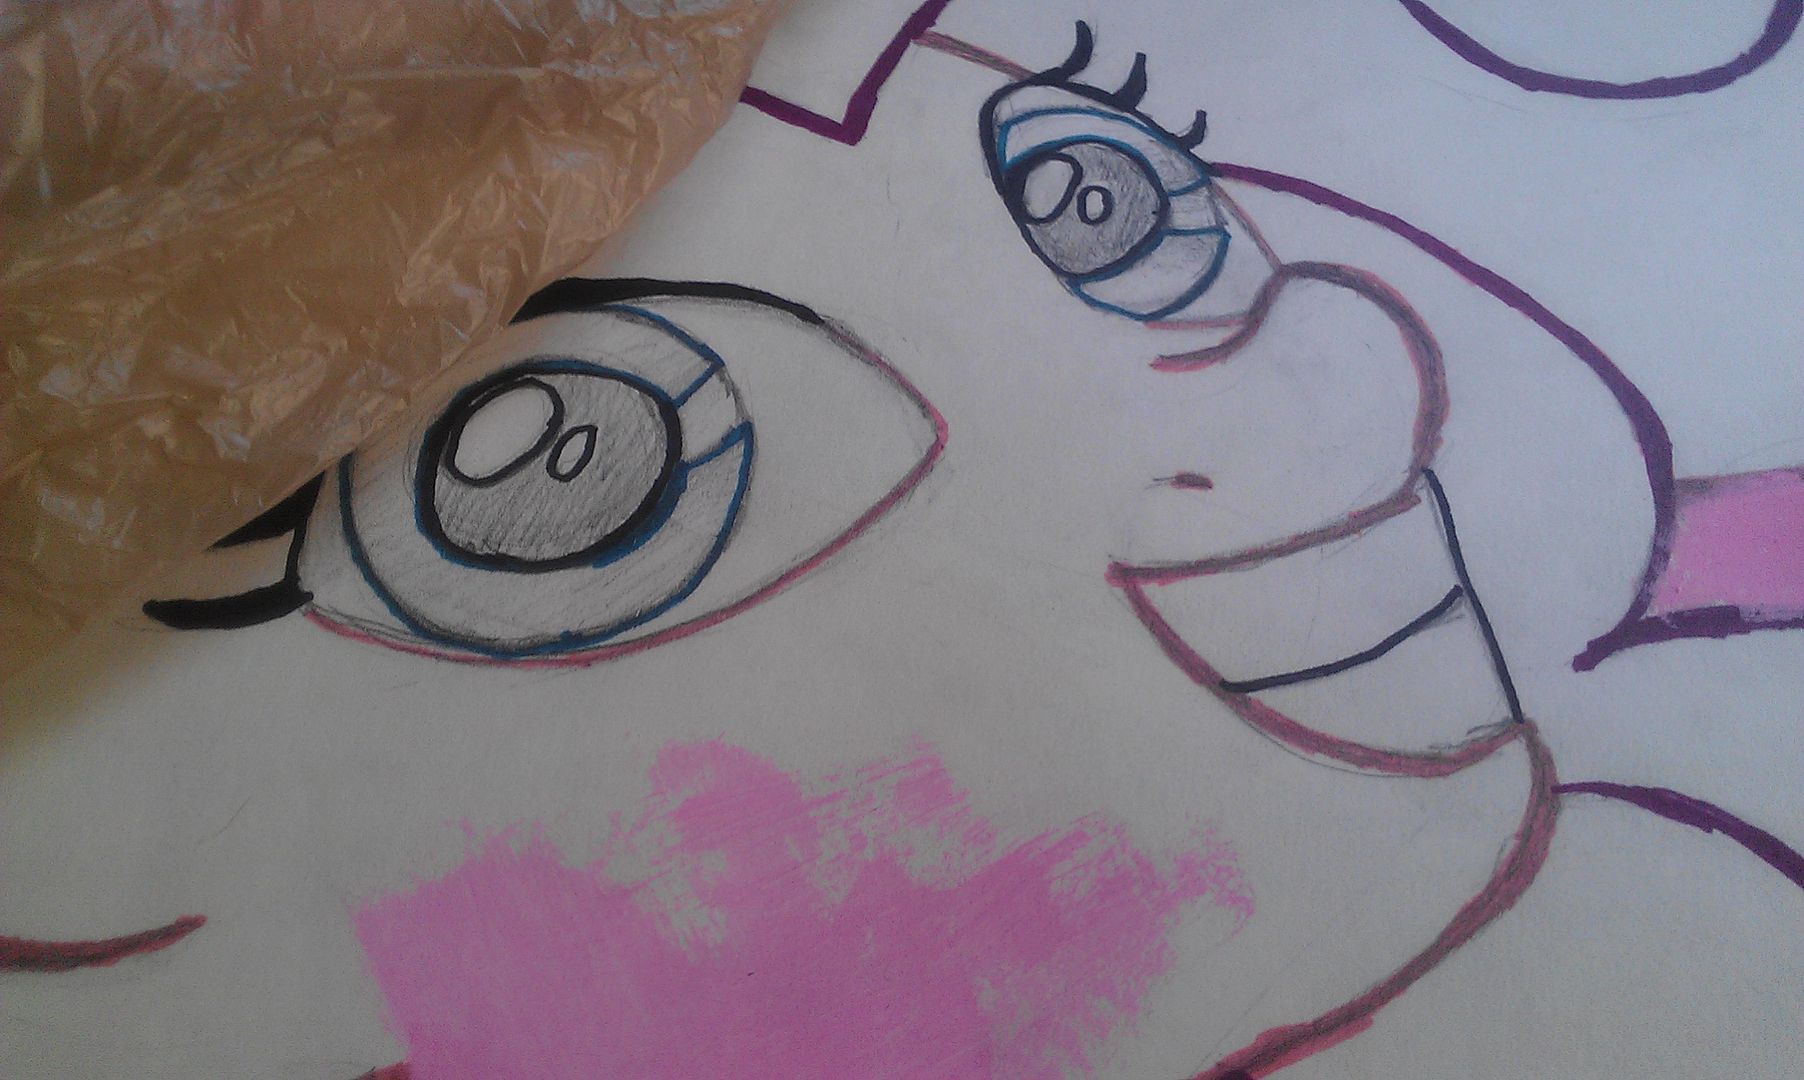
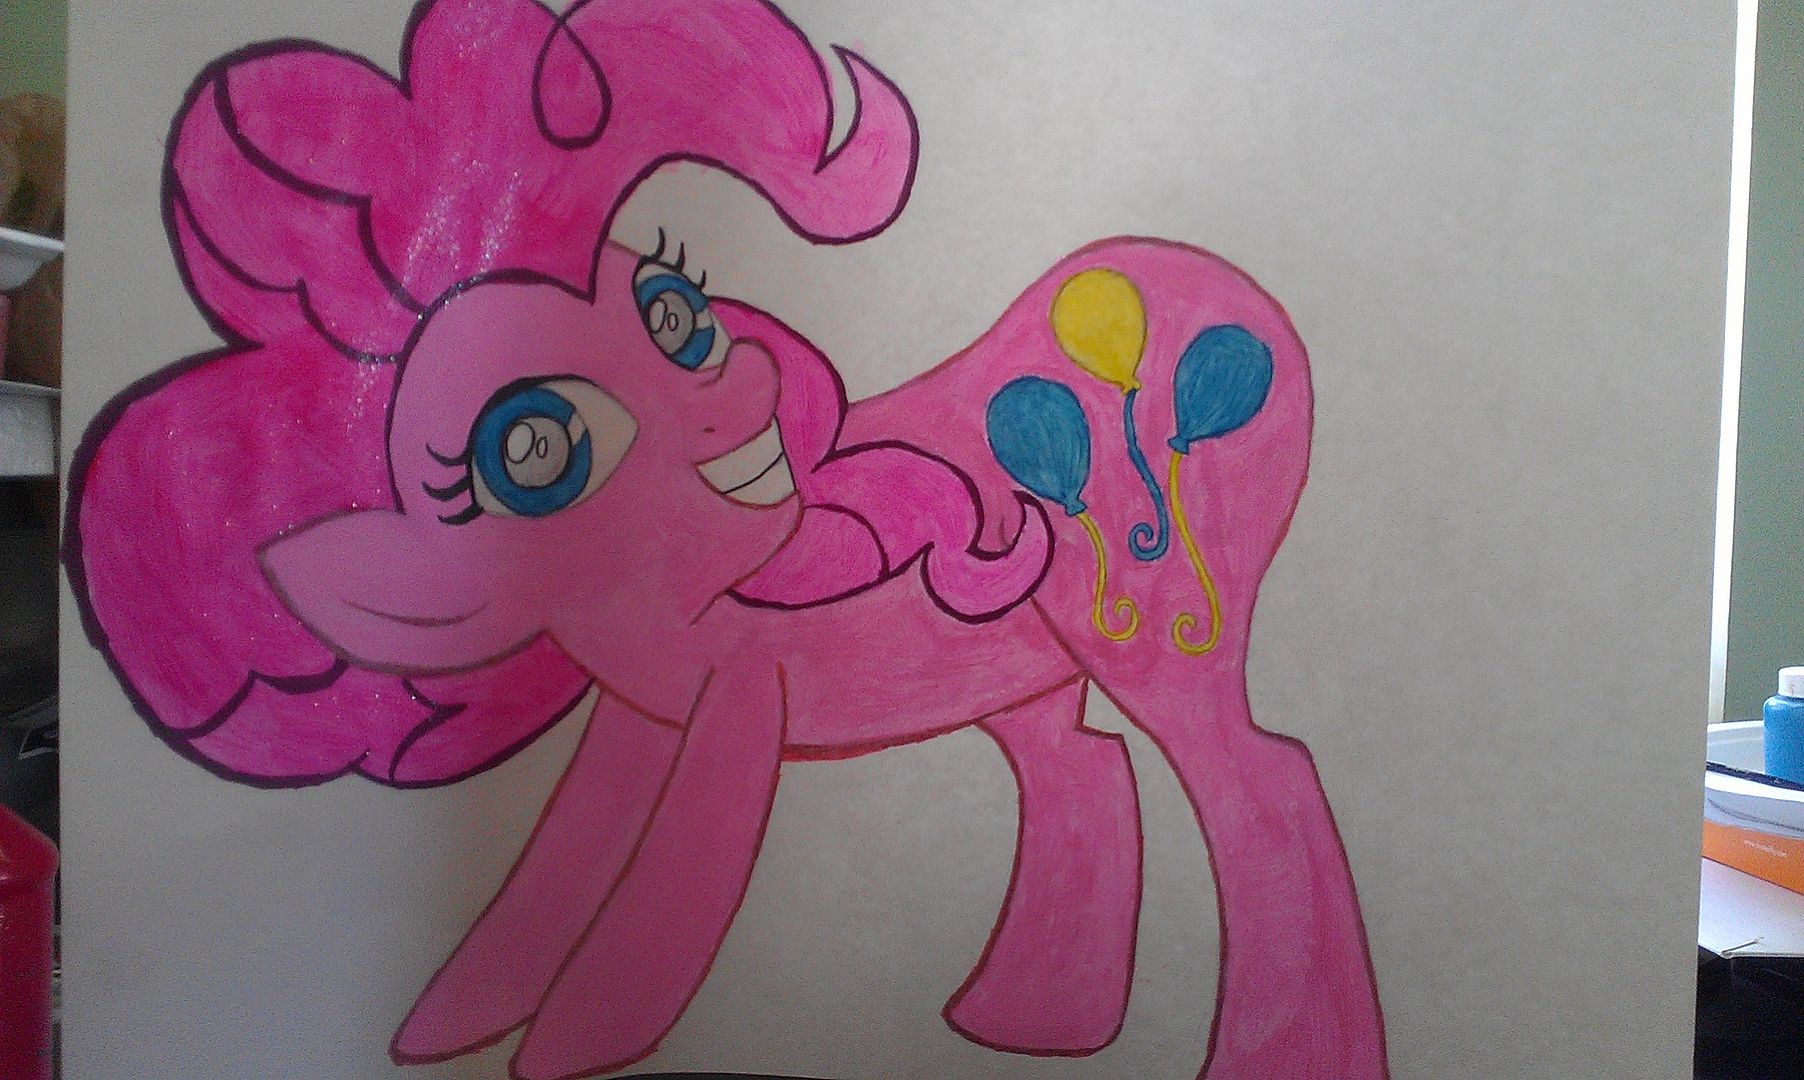
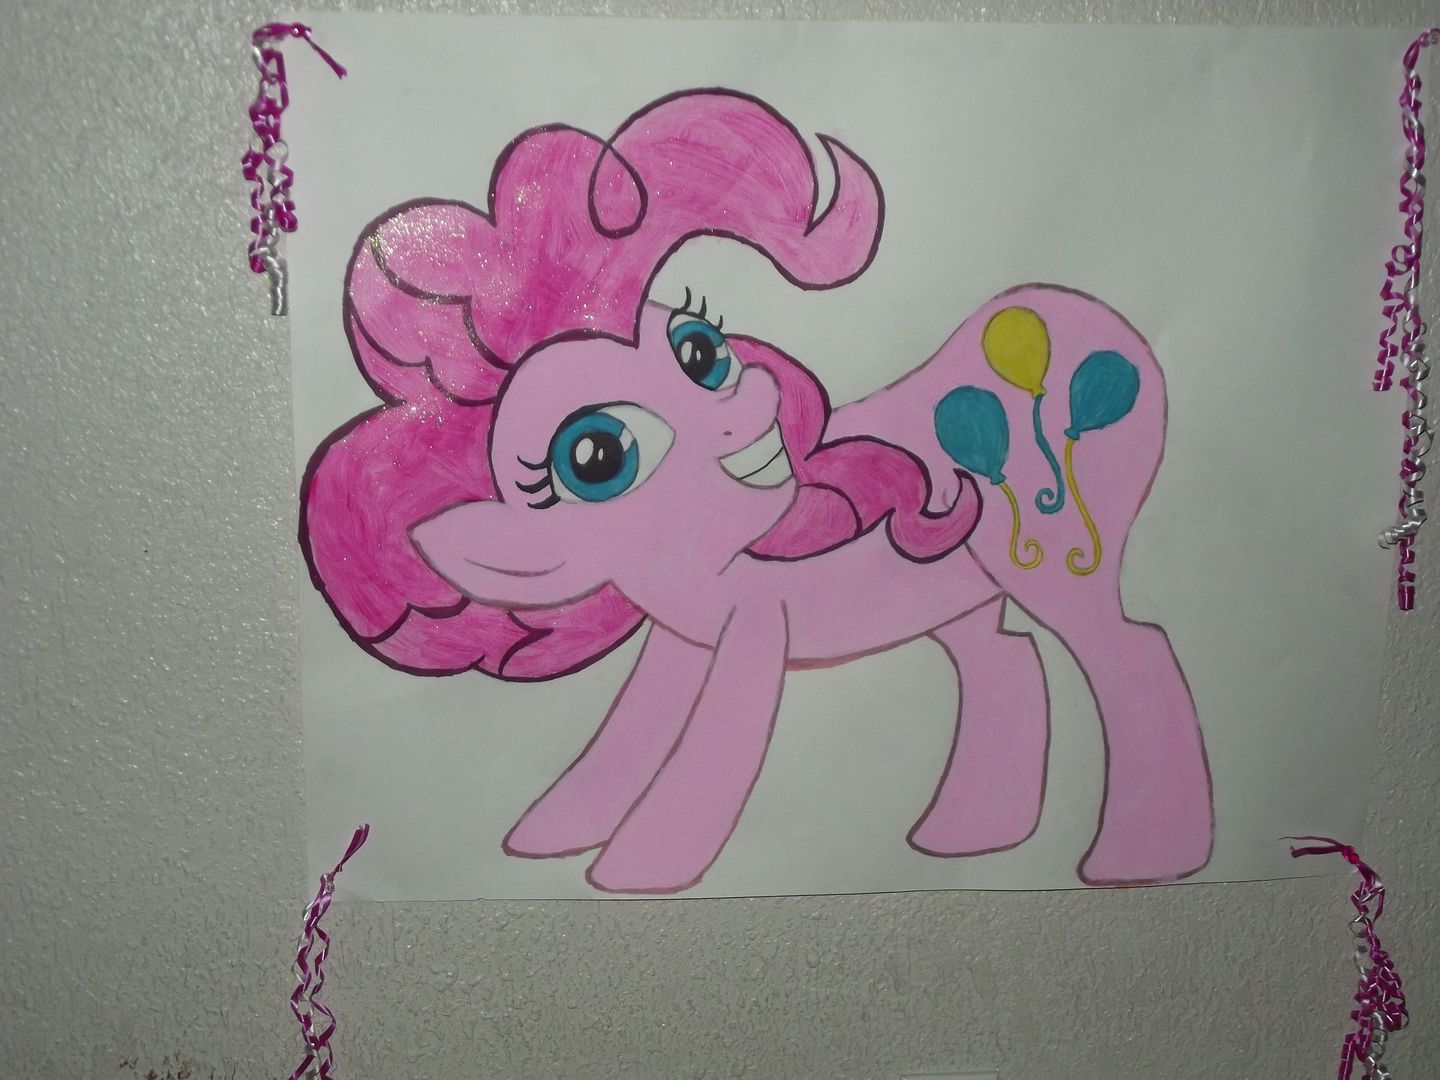
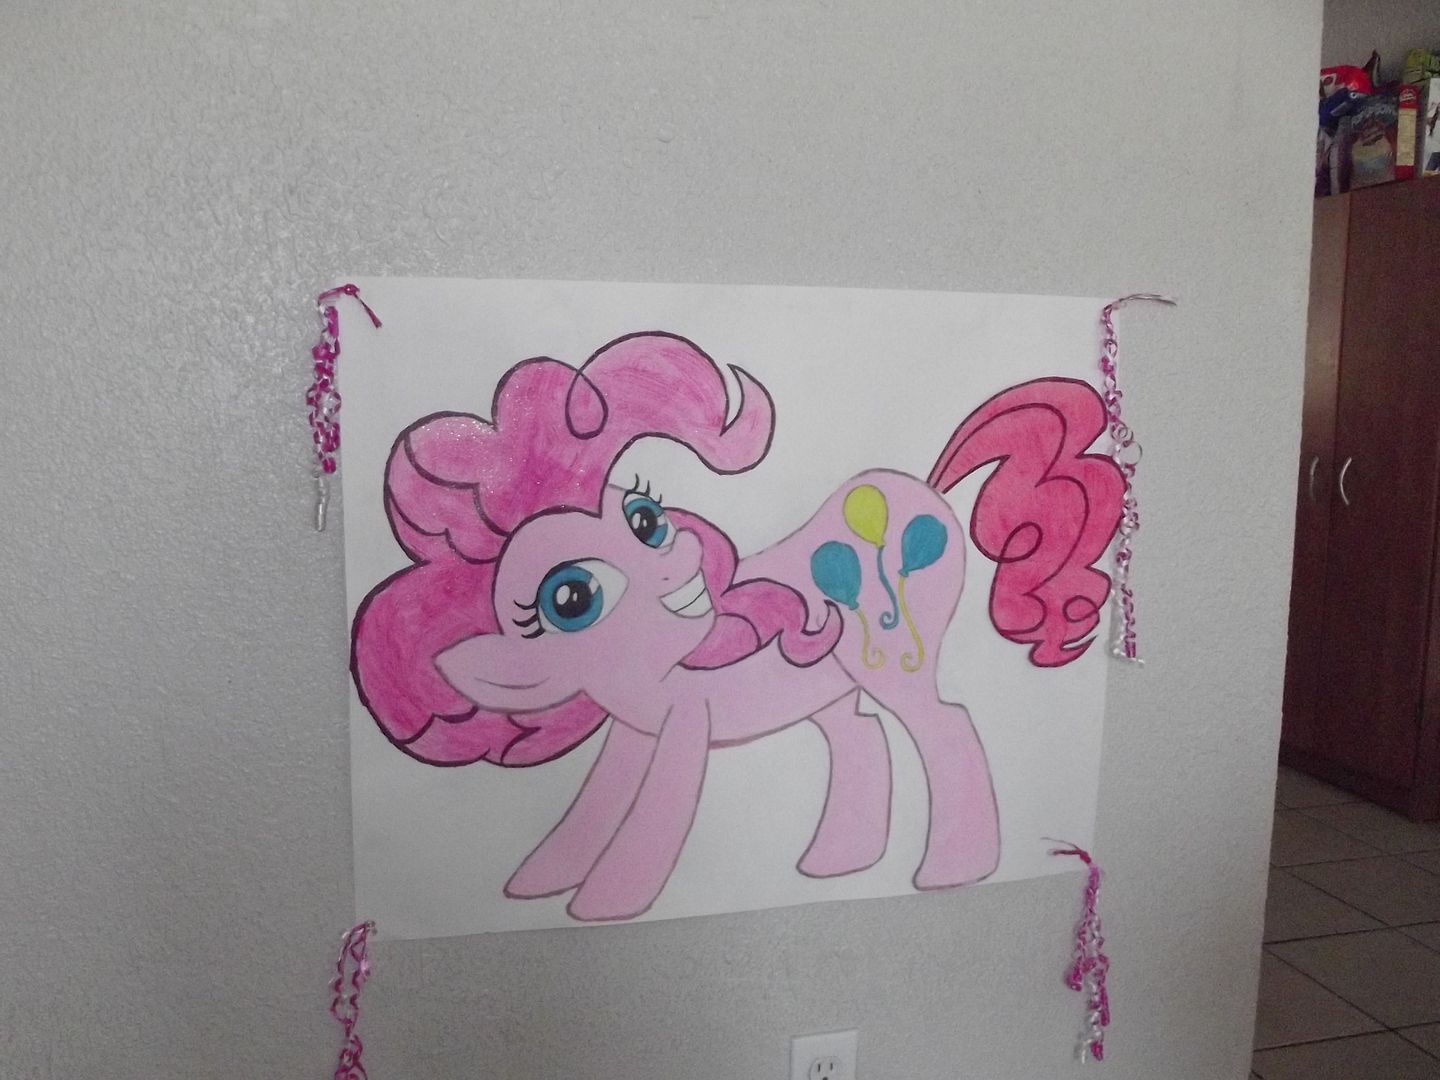
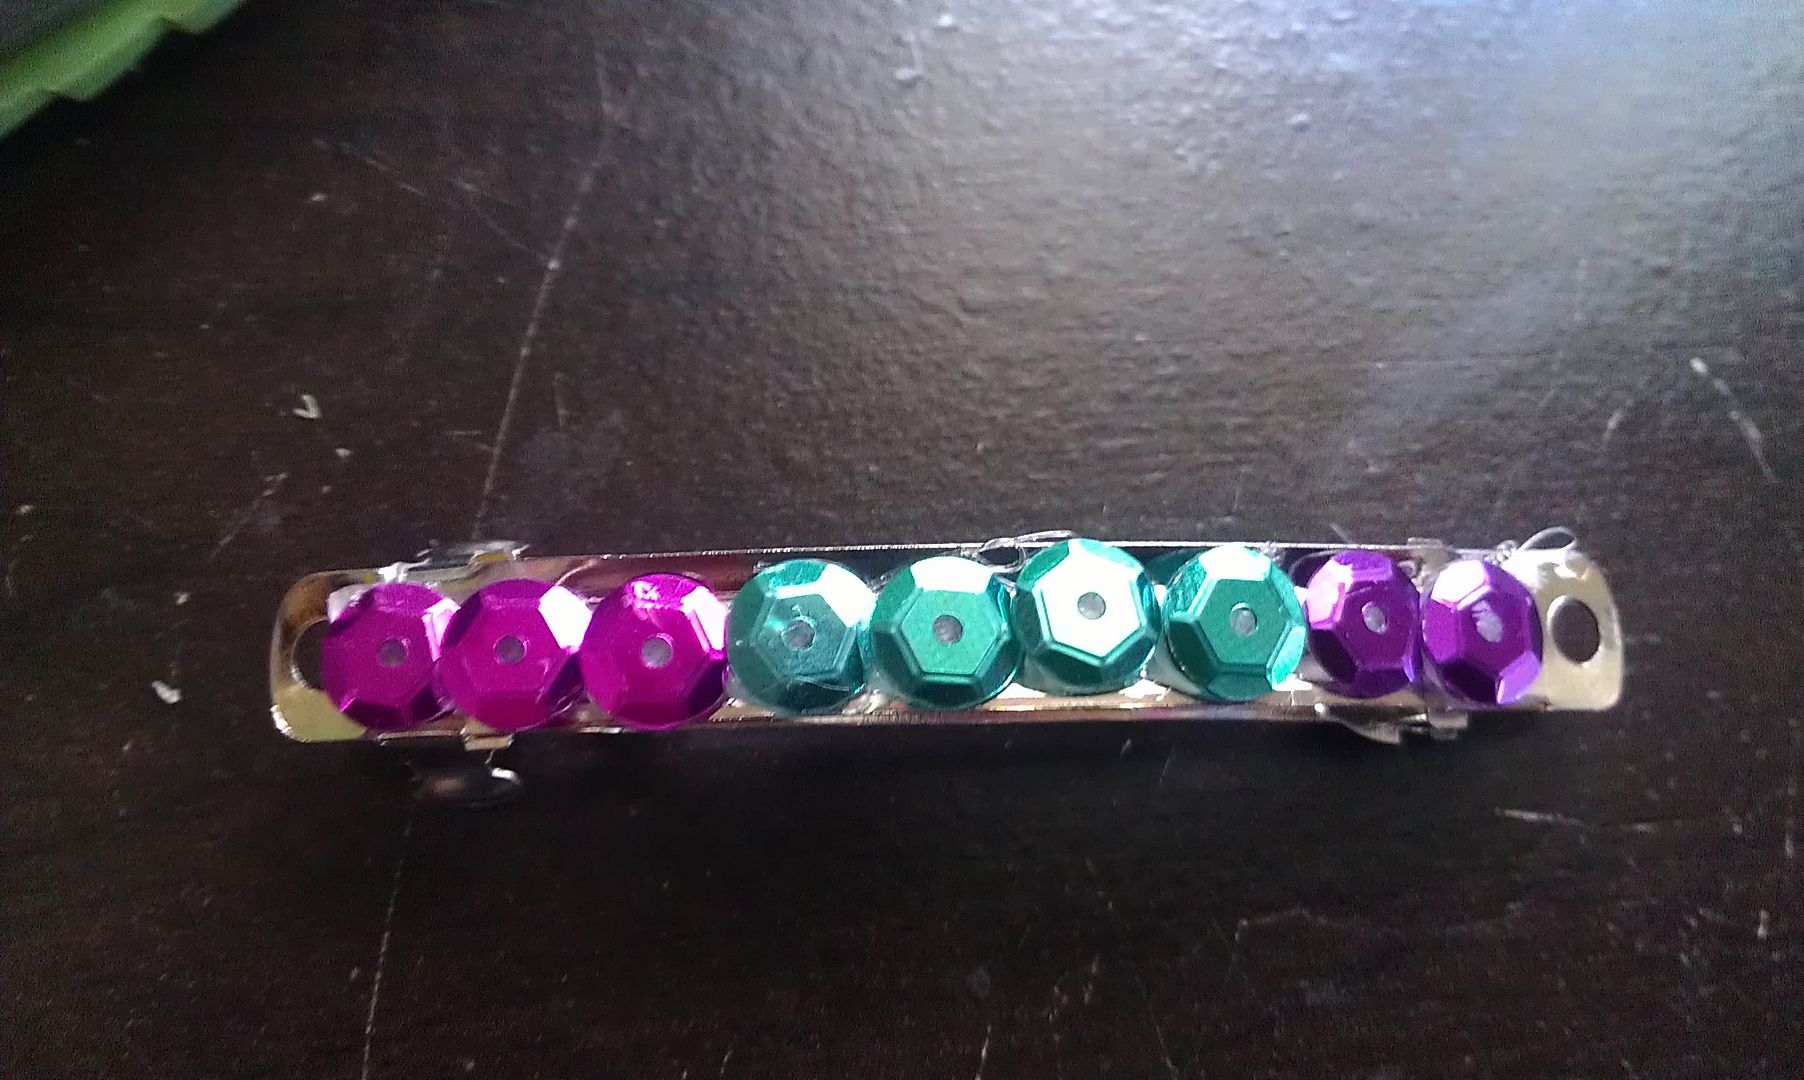
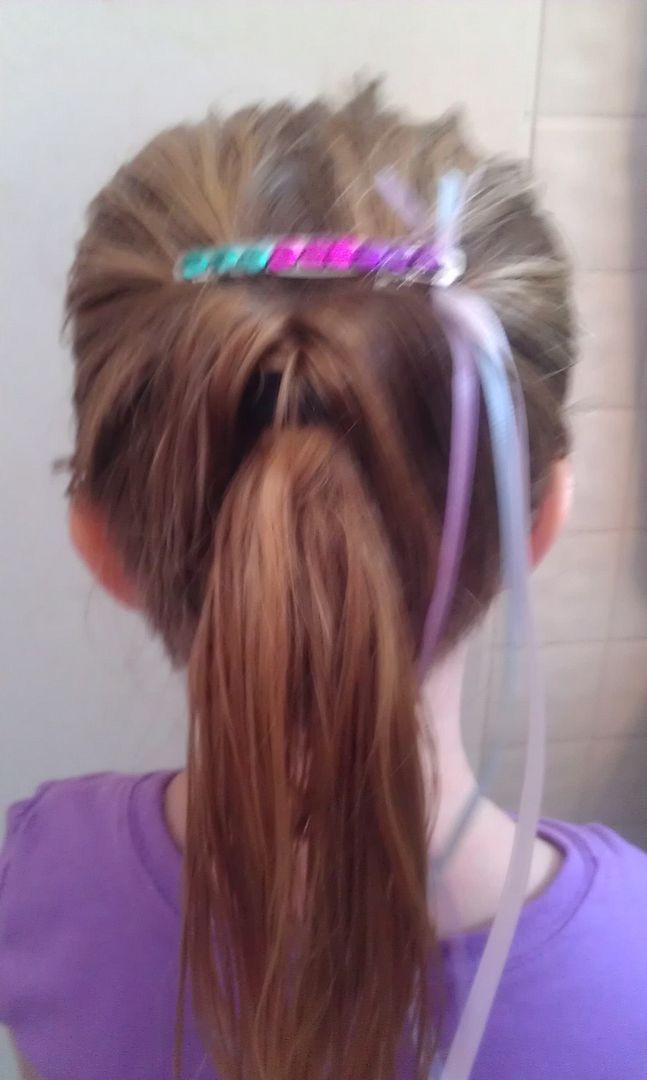
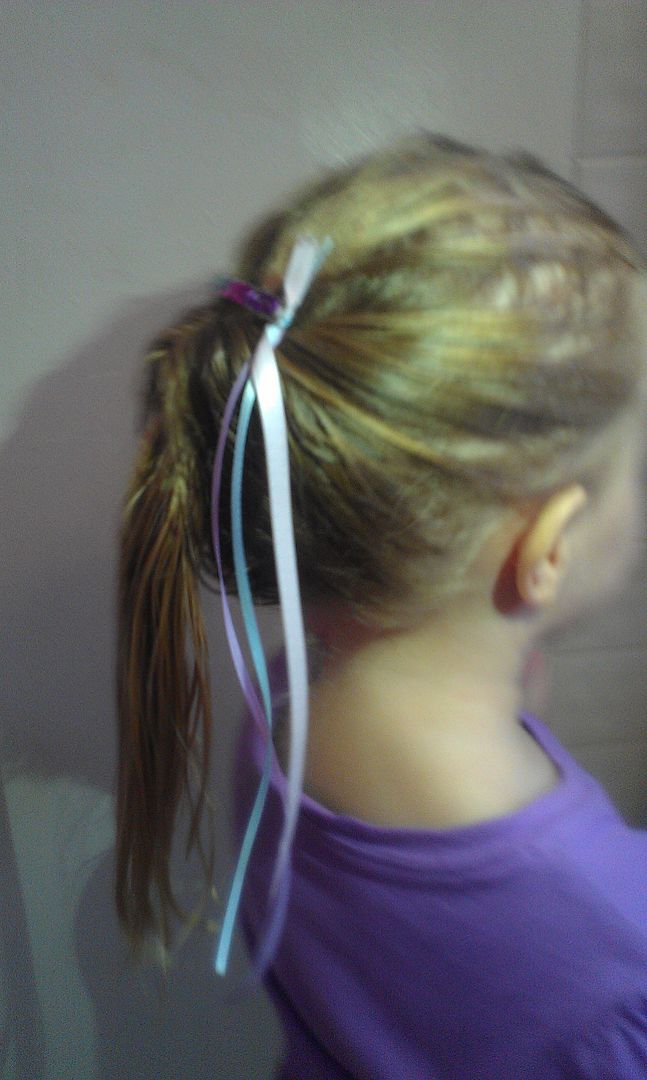
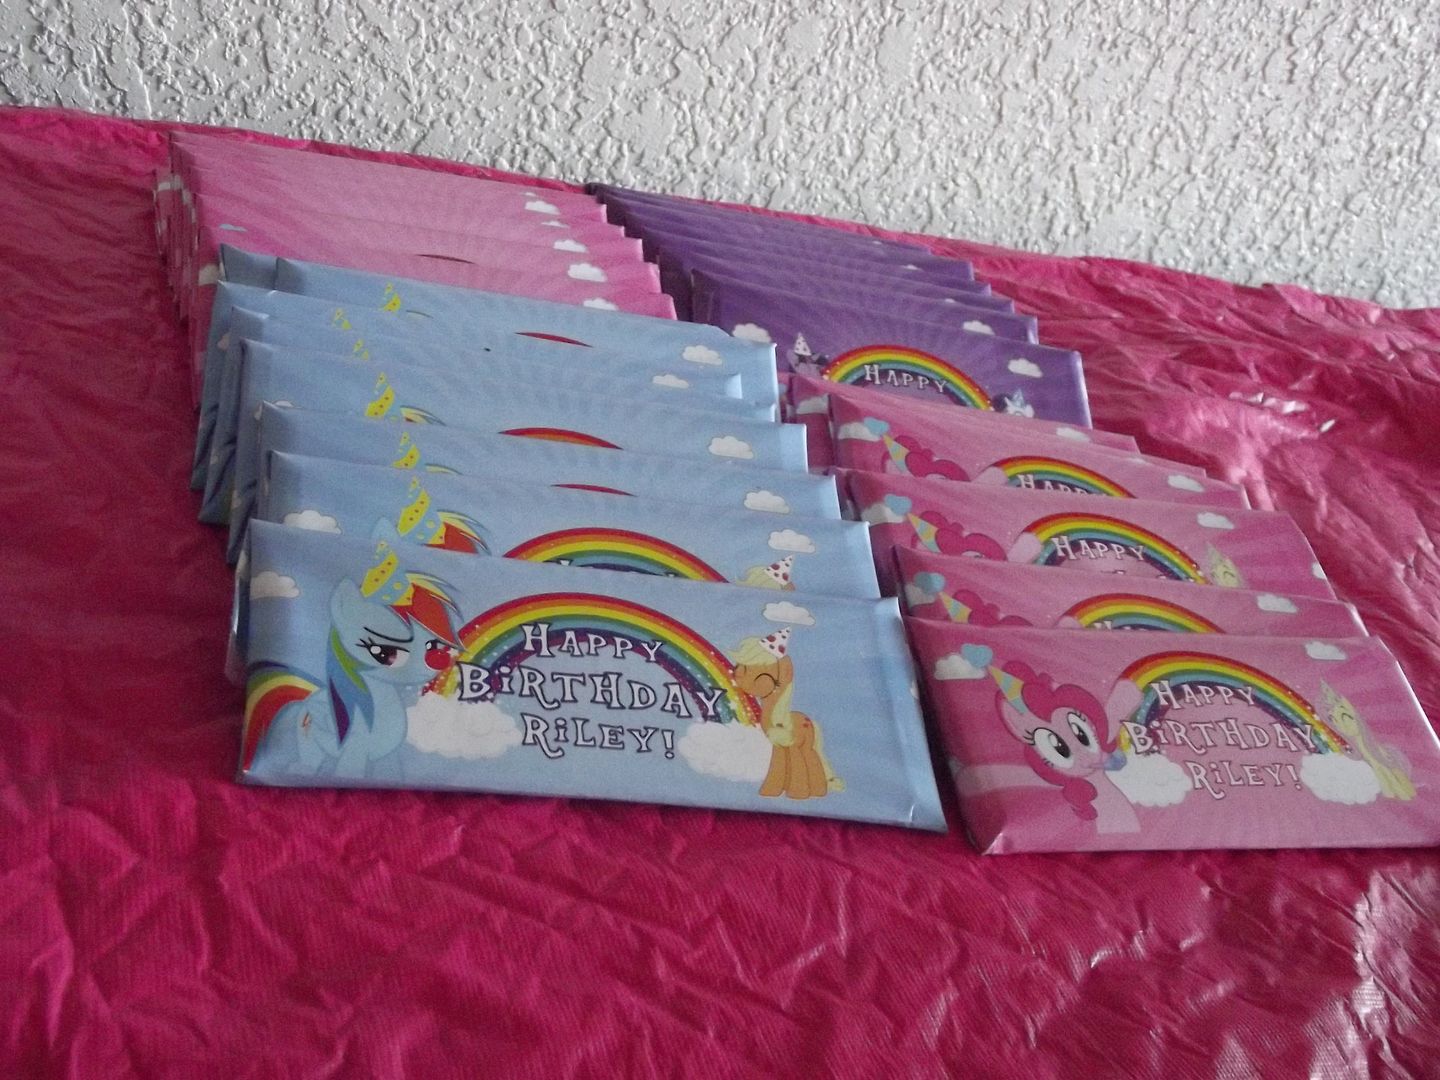
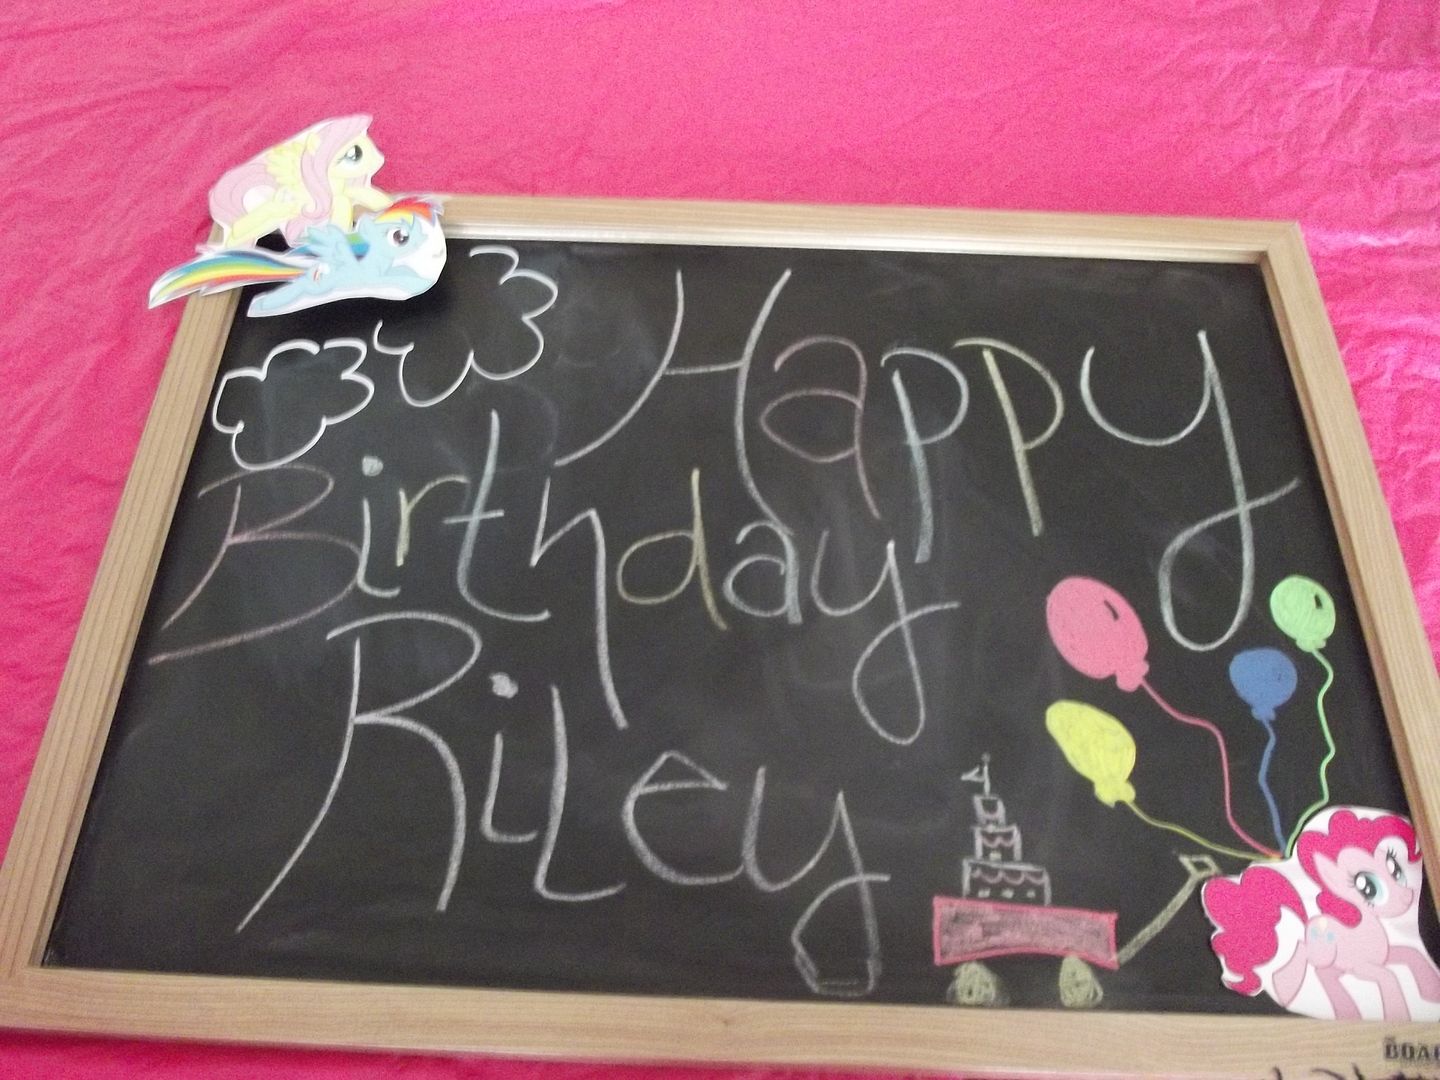
I didn't do anywhere nearly as much DIY and crafting for this party as I did for her last one, but I kept myself busy. I had Mike draw Pinkie Pie on a piece of poster board and then I traced her in Sharpie and painted to make "Pin the Tail on Pinkie Pie". I made some sequin ribbon barrettes for the girls which came out pretty cute. I used the left over barrettes from the Minnie invitations and hot glued pink, purple and green blue sequins on them. Next, I just cut pink, blue and purple ribbon of the same length knotted them together and glued them to the non-opening end of the barrette. Mike and I also collaborated on some custom candy bar wrappers for our favors. We designed them with some deviant art vectors and paint shop and had them printed on glossy paper at Kinkos. I made some chalk board signs for decorating the table and next to the bouncy castle.
Pin the tail on Pinkie Pie Game

Ribbon Barrettes


Favors


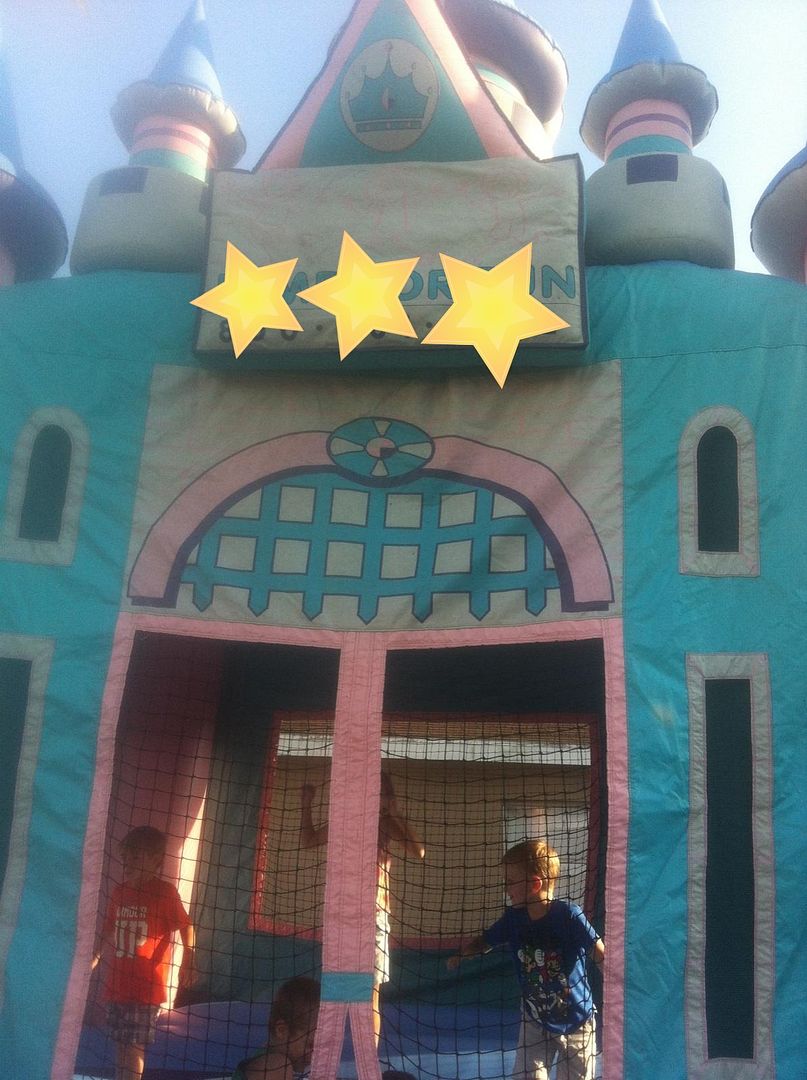
Decor


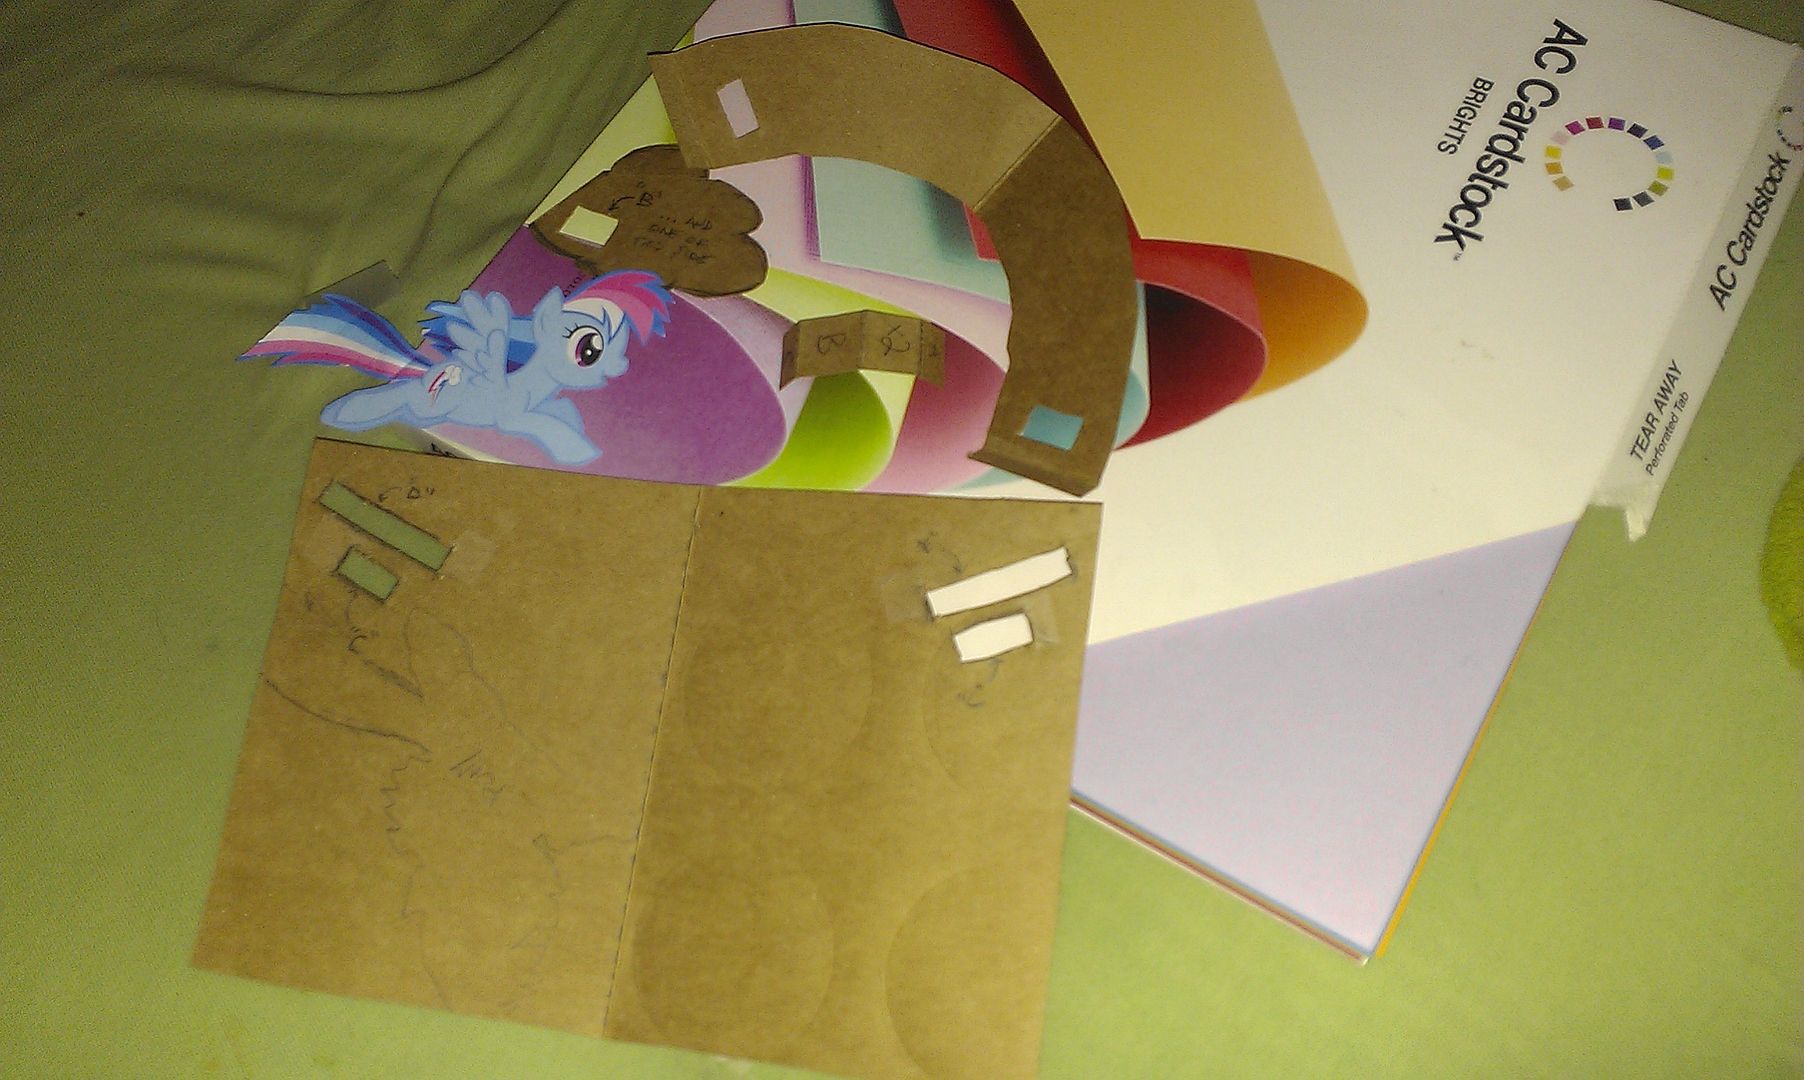

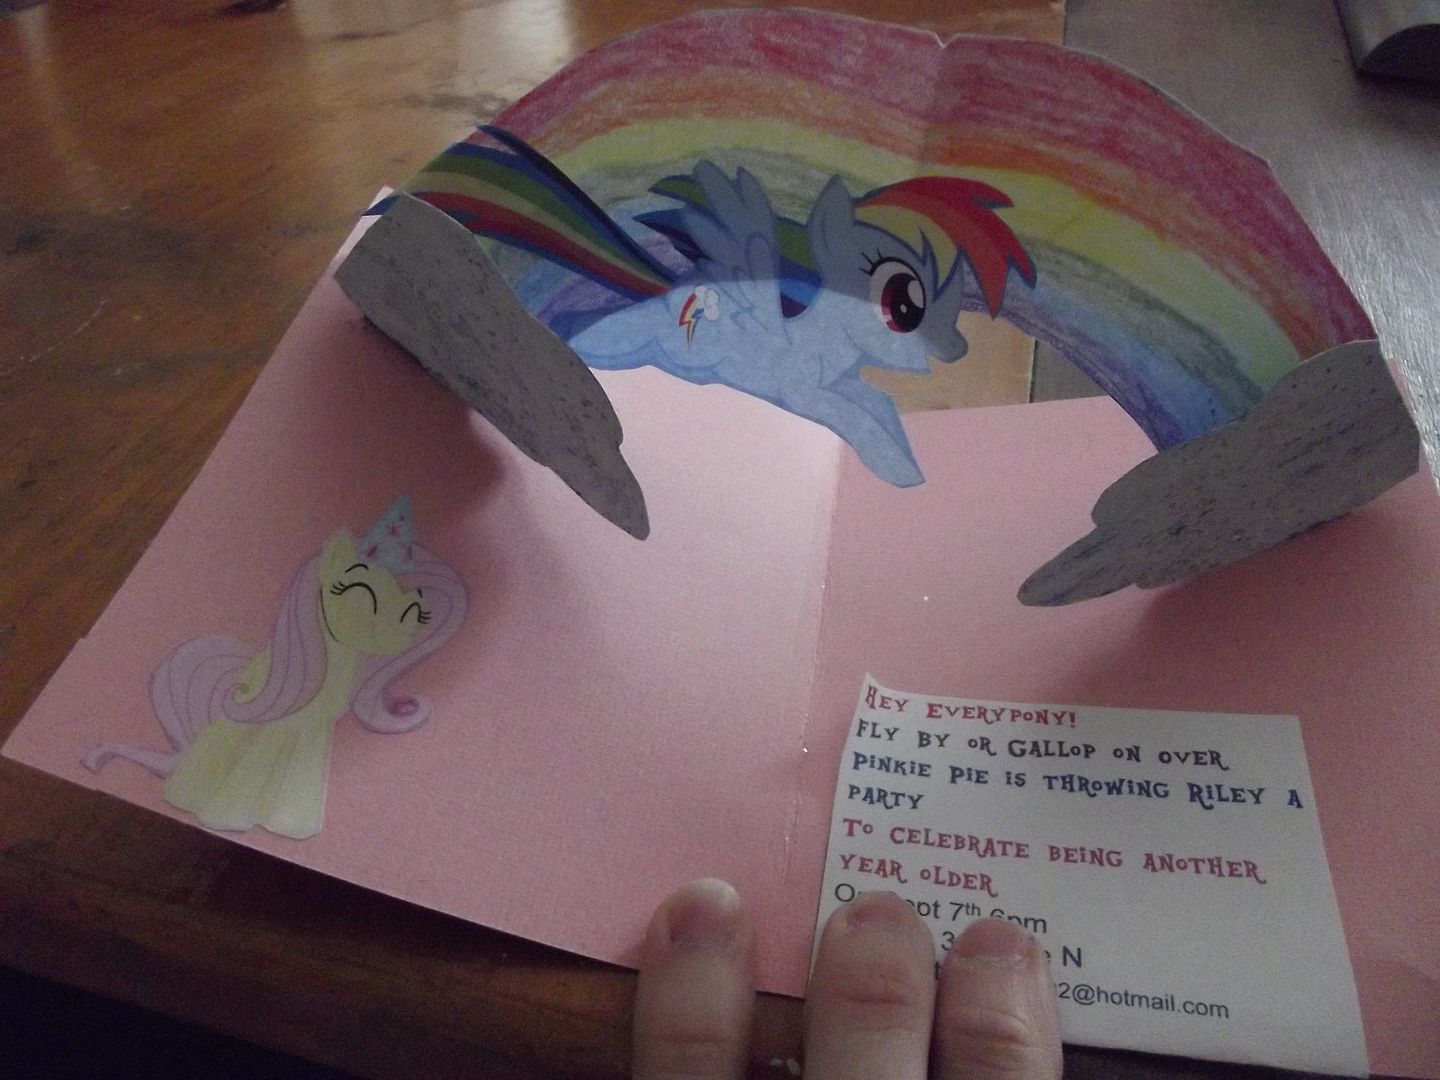
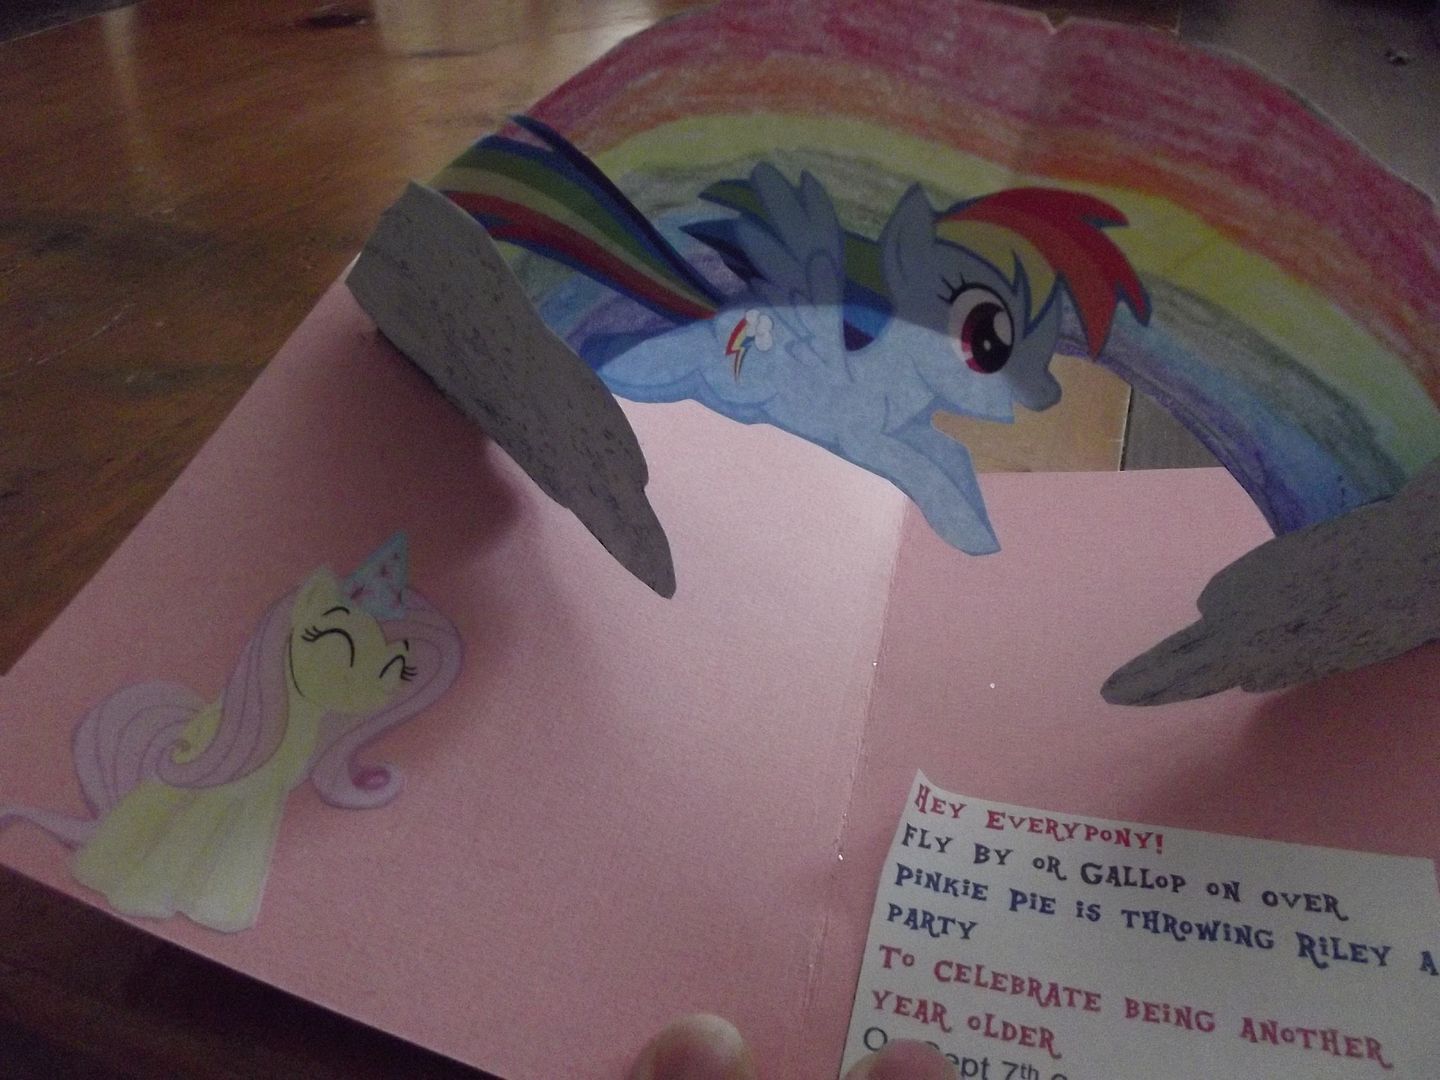
There wasn't alot of inspiration on the old inter web for this project. I guess most people just buy a pack at the party store or photo shop something, but we decided ours HAD TO be a pop up. Since Roo's favorite is Rainbow Dash we decided she should be flying by a rainbow. Mike used an old soda box and cut cardboard templates for the card, rainbow, clouds and tabs. When I can get my scanner working correctly I'll upload our templates for anyone who is interested in them. Once you have the templates it's just a lot of cutting and assembling.
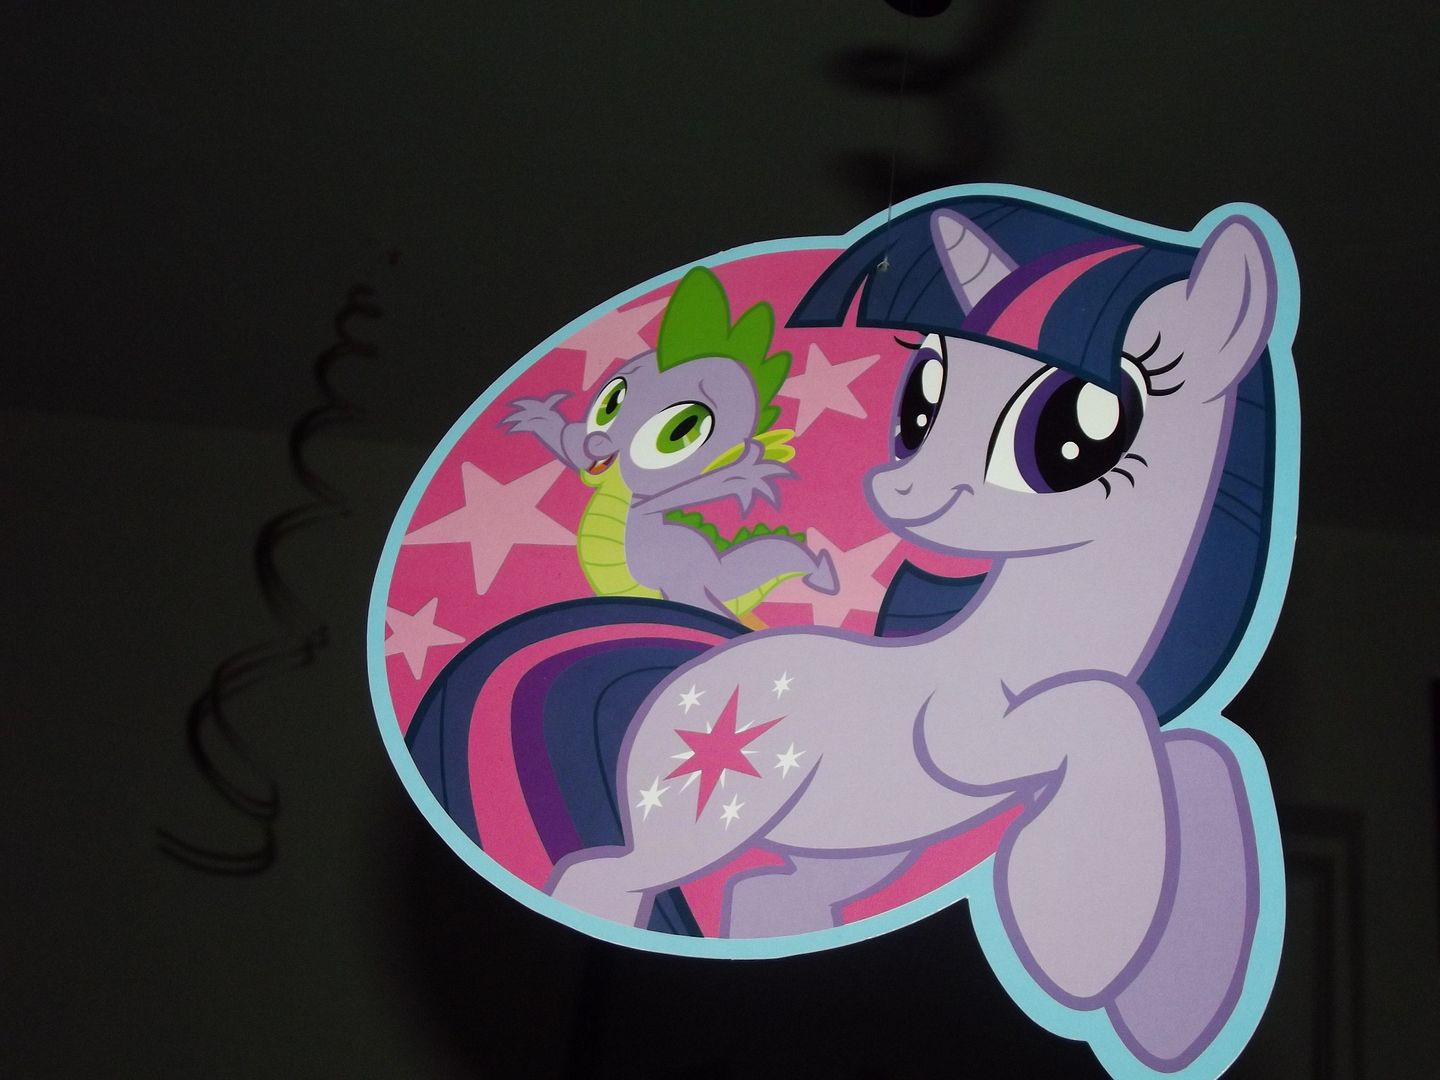
Also, I searched for stickers with the right ponies in the right poses and got frustrated quickly. So, I found images online and then to make cutting them out easier I added a bleed around the edges in paint shop. I don't know where Rainbow Dash came from in the end, but I was able to download Pinkie Pie by Lisosaurus and Fluttershy by Sticer555 as vectors from Deviant Art.


I used my good old paper cutter to cut out the cards on pink and purple cardstock. We started by measuring an A4 invitation envelope. After last years' multiple envelope issues I knew to start with that. I had ivory colored envelopes left over from another project. Once I had the cards cut out I traced the boxes from the template and labeled them with the corresponding letters.


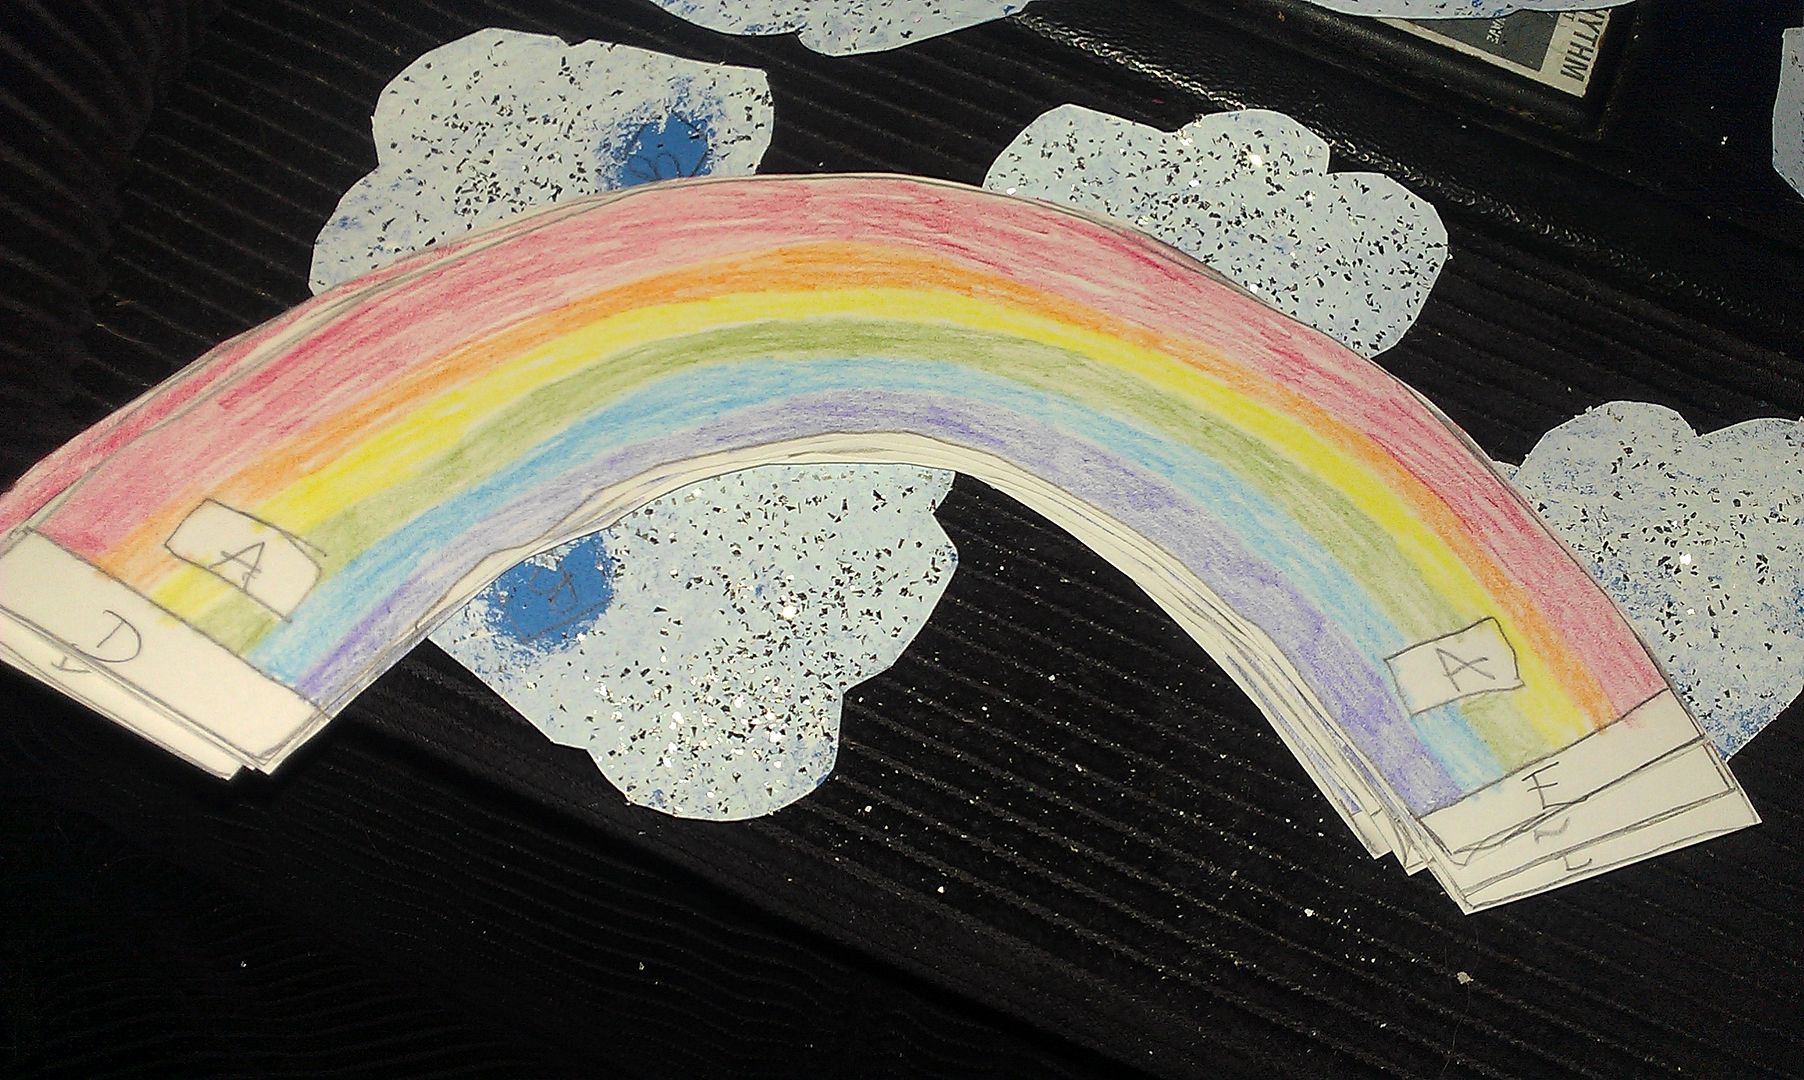
We made one cloud template and then flipped it over to make pairs for either side of the rainbow. I didn't have white cardstock when I started these so I cut the clouds out of blue. Then I sponge painted them white and added silver glitter! I LOVE the way they turned out. I bought a pack of white card stock for the rainbows (and that was the only thing I bought for these invites Yay, resourcefulness!).
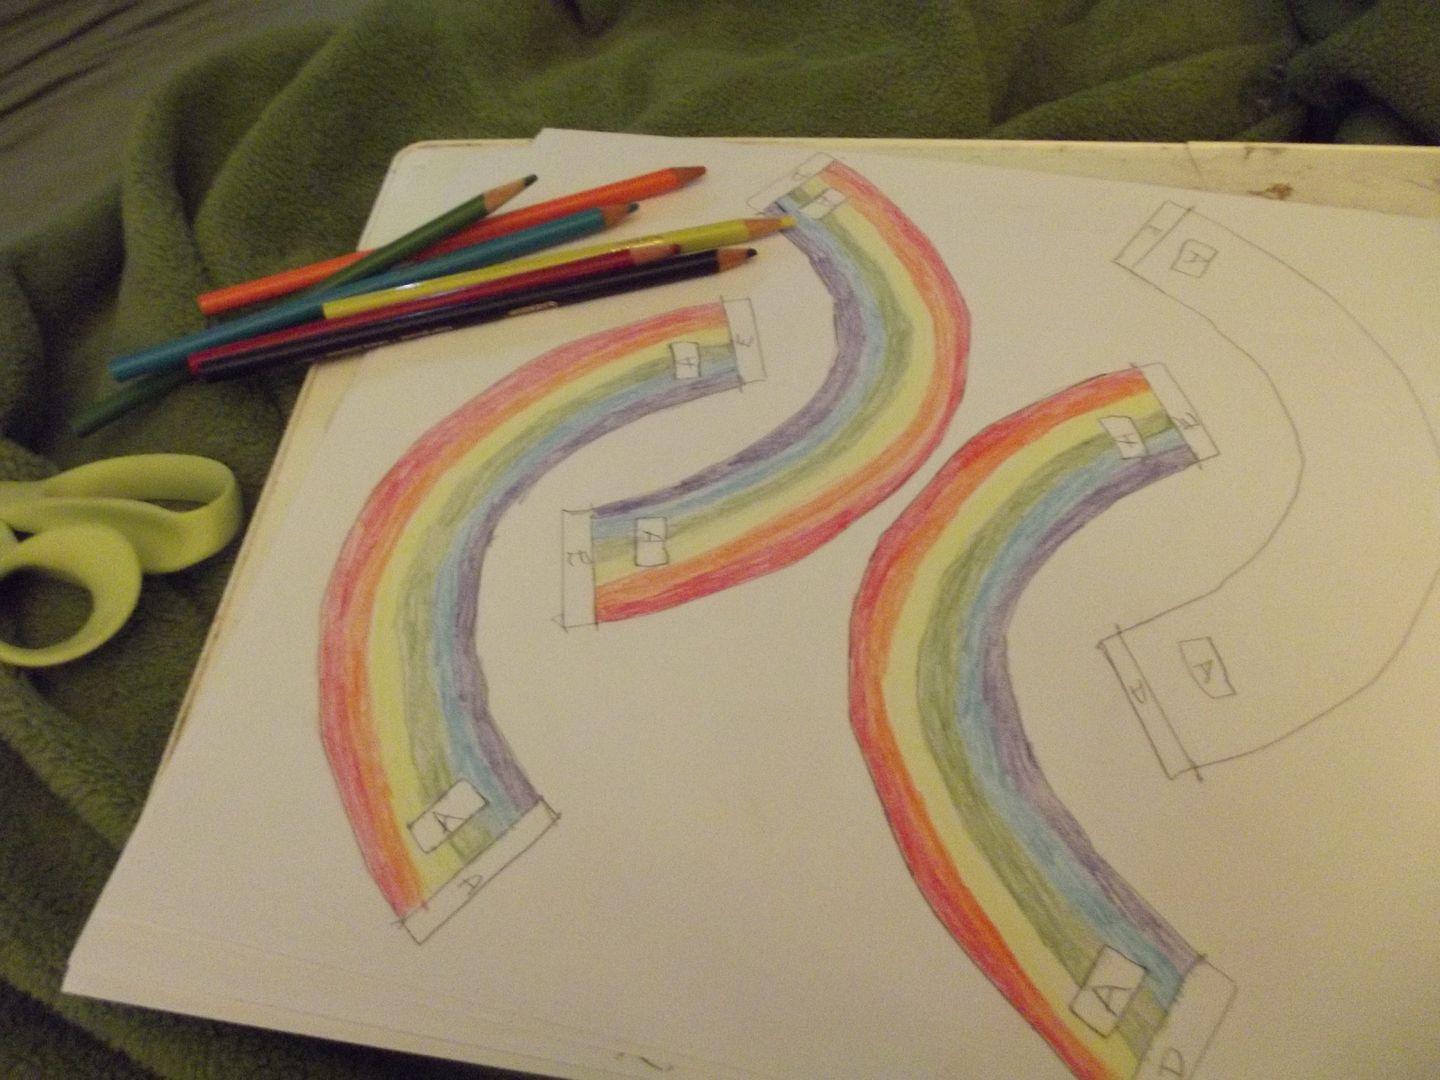
After I traced the rainbow template I hand colored them with colored pencils. It felt more authentic to the theme plus I like kids invitations to look home made. Red, Orange, Yellow, Green, Blue, Indigo and Violet then repeat!
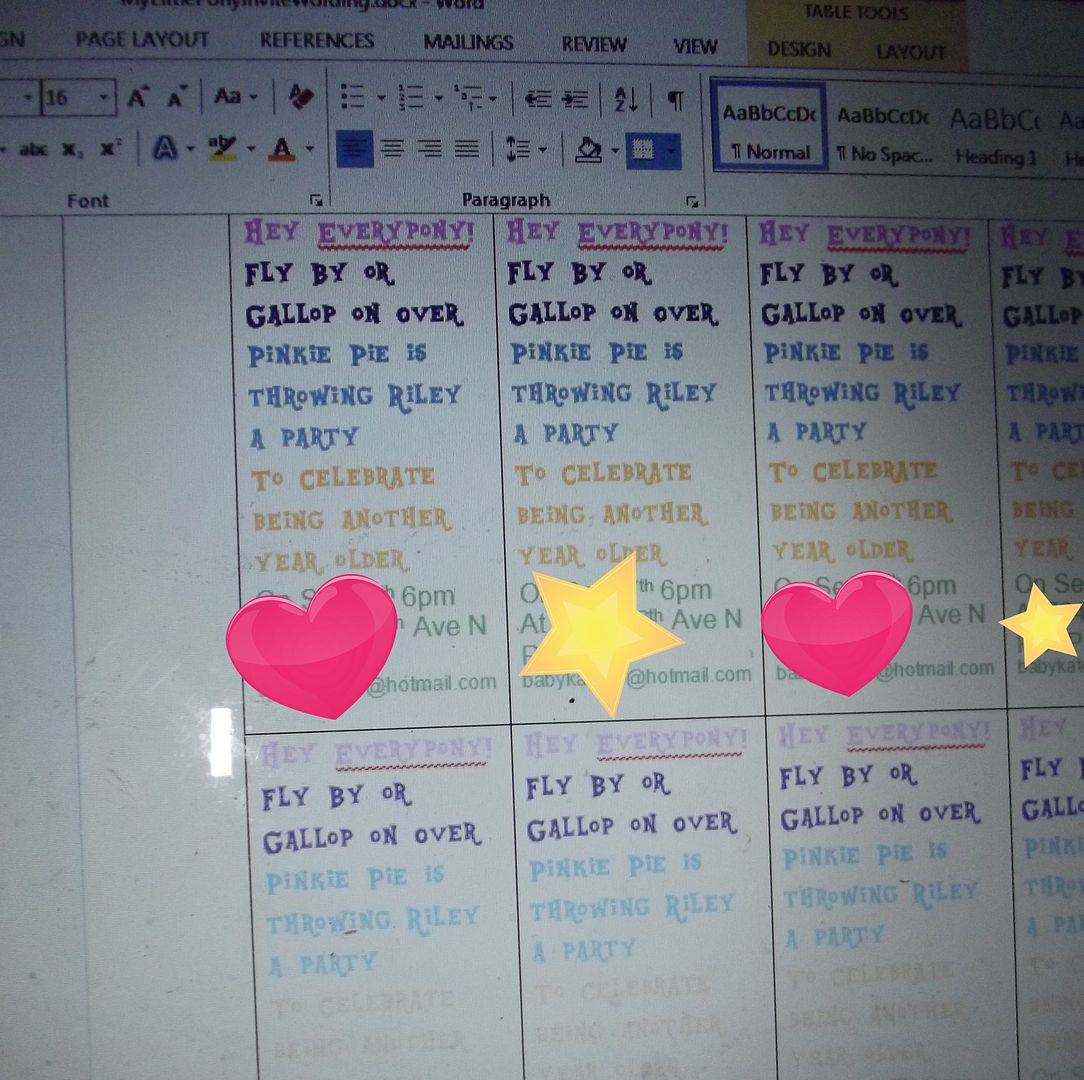
I wanted to keep the wording super simple so it didn't overcrowd the pop up images. I downloaded a font called Equestria from font freak and choose some My Little Pony colors. I just made a table in Microsoft Word and typed my message in the first box. Once I was happy with it I copied it into each cell on the table. It says "Hey EveryPony! Fly by or gallop on over, Pinkie Pie is throwing Riley A Party, To celebrate being another year older." I followed that with a brief when, where and RSVP email. Honestly I don't think anyone really uses the RSVPs on paper invites anymore. I always send an email or Evite to all the grownups before I sent the handmade invites to kiddos and they generally RSVP there.
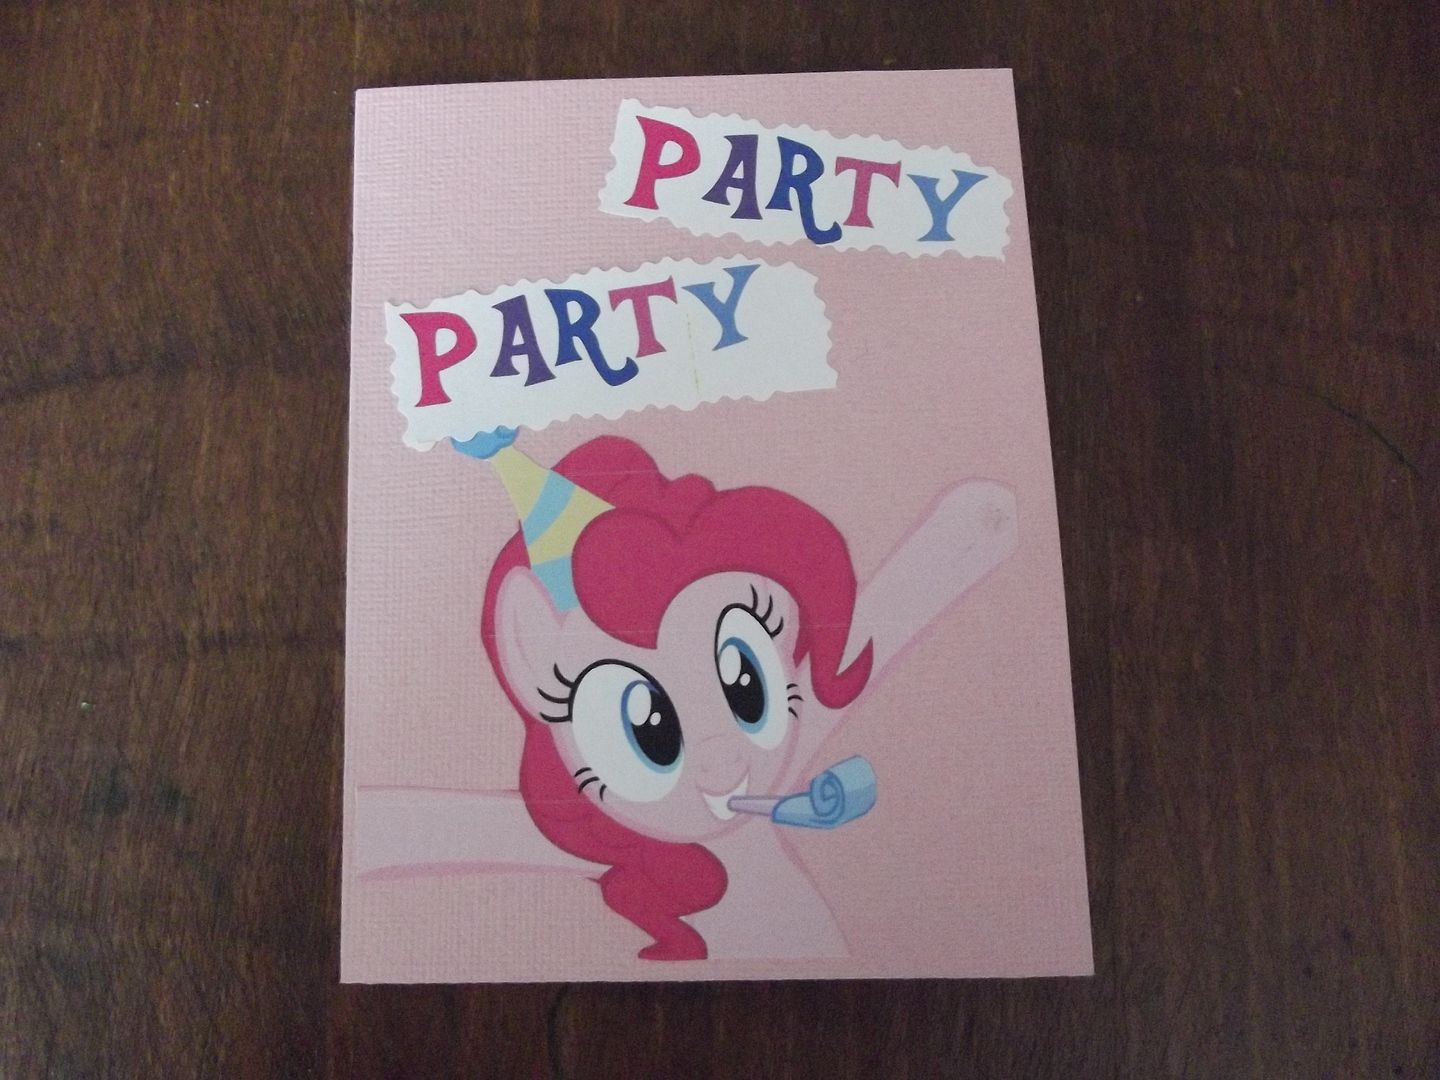

For the front I typed the word party in the Equestia font in rainbow colors and cut it out with edging scissors. Then I added Pinkie Pie. Once the rainbow, clouds and Rainbow Dash where in place I added the words. I just folded the edge over the back of the card so they would pop up too. When I was done with that I realized we had an empty spot on the left so I went looking for another pony.
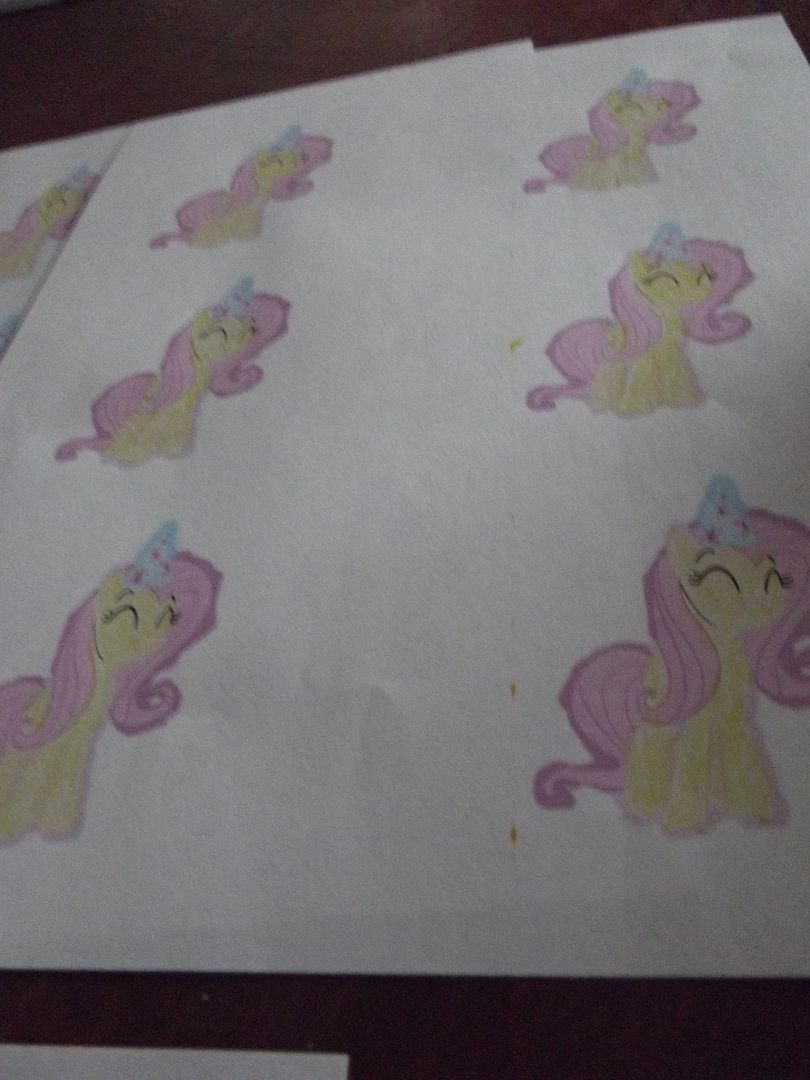
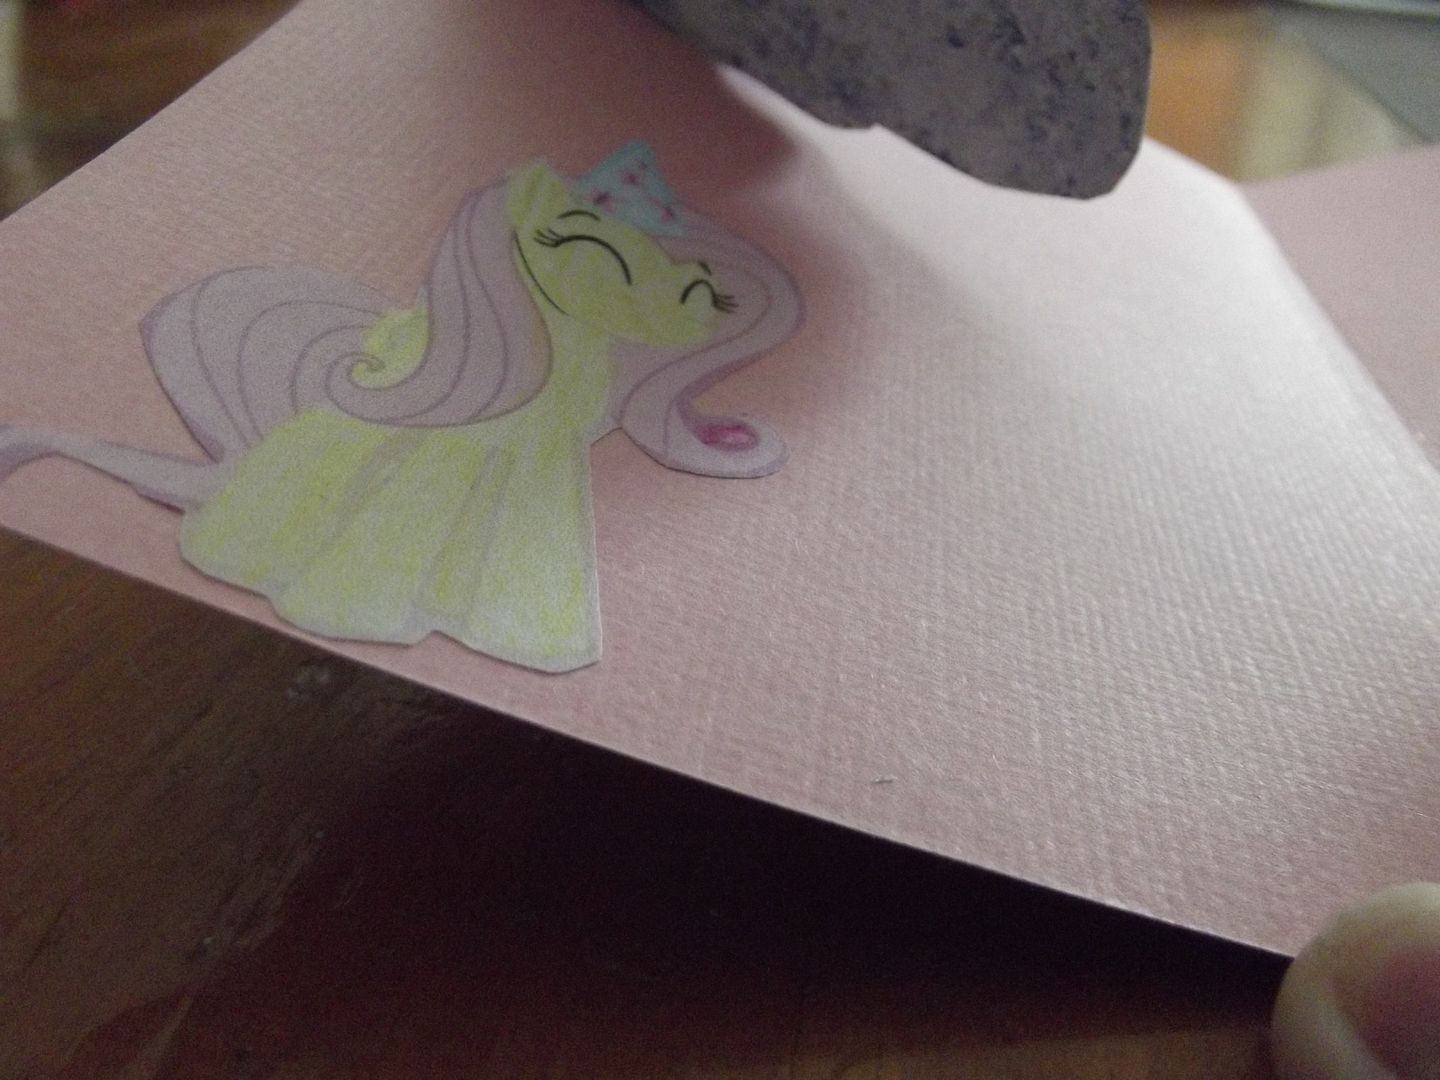
I found the perfect Fluttershy for that spot and if you like her click the link in the first paragraph because that artist has an image for most of the other ponies in party hats too. Unfortunately, my yellow ink freaked out when I printed her so I had to break out the colored pencils again. Don't forget to add a bleed in paint shop to help yourself out. The little curl at the end of her tail was a real challenge!
Here you have it! All done. It required much more prep work then invitations I've done in the past, but over all was very simple to assemble. I loved painting clouds and coloring rainbows by hand (it's how I unwind), but you can always print yours out on card stock to save time if you want a more polished look. I adore these, I don't think we could have done a cuter invitation.
Coming soon: I'll add our templates to this post